“How do you diffuse your light?“
That is the question I get time and time again. But the answer to that question can’t really be explained in a simple paragraph. What works for me, may not work for you. Well, this highly anticipated article that my viewers have requested is finally here.
If you have an interest in macro photography, you would have definitely come across someone telling you that you have to diffuse your light. But what exactly does that mean? Some people try to diffuse their light in a variety of ways but are still not getting desired results.

In every workshop/lesson that I conduct, I will always mention that diffusion is a simple concept when taken at face value, but there are numerous considerations and attributes that make diffusion of light difficult to master. Fear not, I will teach you exactly how to get the best lighting you can ever get for macro field work.
If you are still asking yourself if you need a flash for macro, or are still unsure about camera/flash settings, magnification and how it affects your depth-of-field (DOF) please head to my other articles regarding an Introduction to Macro Photography and Settings/DOF before reading on.

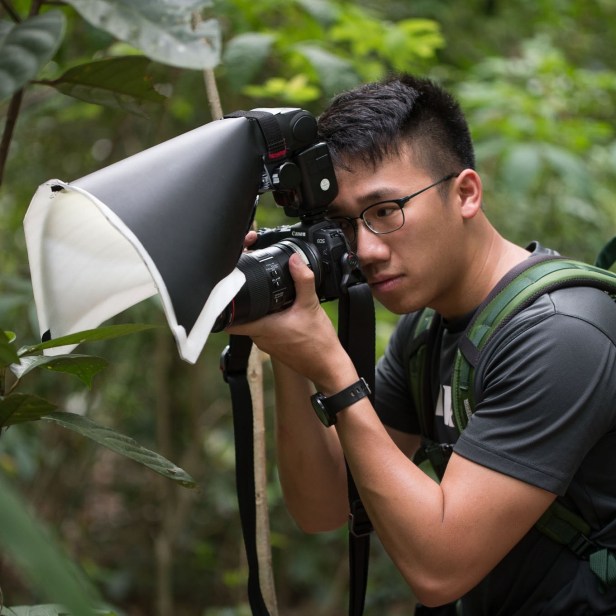
First, let me set the context right, I don’t shoot in the studio. All my images are taken out in the field (95% shot at night) and the subjects are very much alive. My images are all taken handheld (including focus stacks) with the exception of photographing long exposures for UV work. The principle behind my work is to have a smooth workflow as well as the highest hit rate possible (to reduce stress on the subjects) and to photograph them in-situ as much as possible.
Disclaimer: Locations would not be disclosed to protect the arthropods from poaching.
WHY diffuse your light?


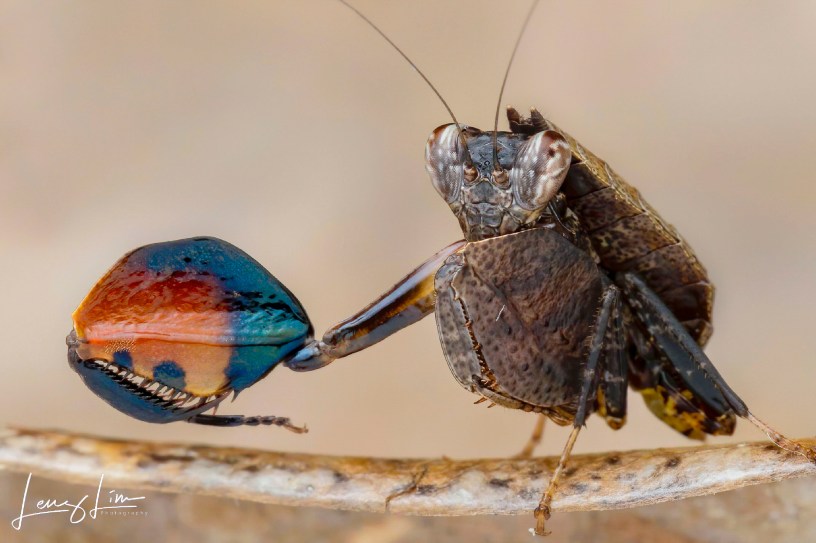
The most effective and efficient way you can achieve the cleanest possible images with large depth-of-fields is by using artificial lighting (a flash). However, the direct light from your flash unit will introduce specular highlights and cast harsh shadows. This is the primary reason why you need a diffuser for macro photography. When flawlessly executed, proper lighting allows you to extract the most detail and the most accurate colours in your images.
A word of caution, having everything in focus with even lighting can result in images looking too flat. Never make it your goal to completely eliminate shadows as they are significant for contrast, to convey emotions and to draw attention to important details.
“Soft, Diffused Light creates Textures you can see”
Me
WHAT are the types of Light?

Let’s discuss different terminologies and the types of light; hard, soft, specular and diffused. Understanding this can facilitate troubleshooting and help you pin-point what modifications/improvements to make to achieve your desired results.
Hard light vs Soft light
The difference lies in the kind of shadow cast. Light is said to be hard (harsh) when shadows are seen as sharp, clear and having rather defined edges. On the contrary, soft light produces blurry, faded shadows where the outline of your subject can be more difficult to determine.
Hard light where shadows are sharp with clear outline of the subject
Soft light where shadows are blurred with no defined edges
So how do we produce soft light? This depends on two factors.
- The size of your light source relative to the subject
- The distance between your light source to the subject
Bending of light (diffraction) can be used to explain the results from these variables but let’s skip all the secondary school physics diagrams and get to the conclusion.
Larger light source and a shorter distance to subject = Soft light
Smaller light source and a further distance to subject = Hard light
Specular light vs Diffused light
The simplest way to explain this is by shining a regular torchlight on a wall. You may notice a higher concentration of the beam right in the centre, forming a “hot spot” before spilling in every direction. This is called specular lighting. Diffused lighting is achieved when light is evenly spread throughout.

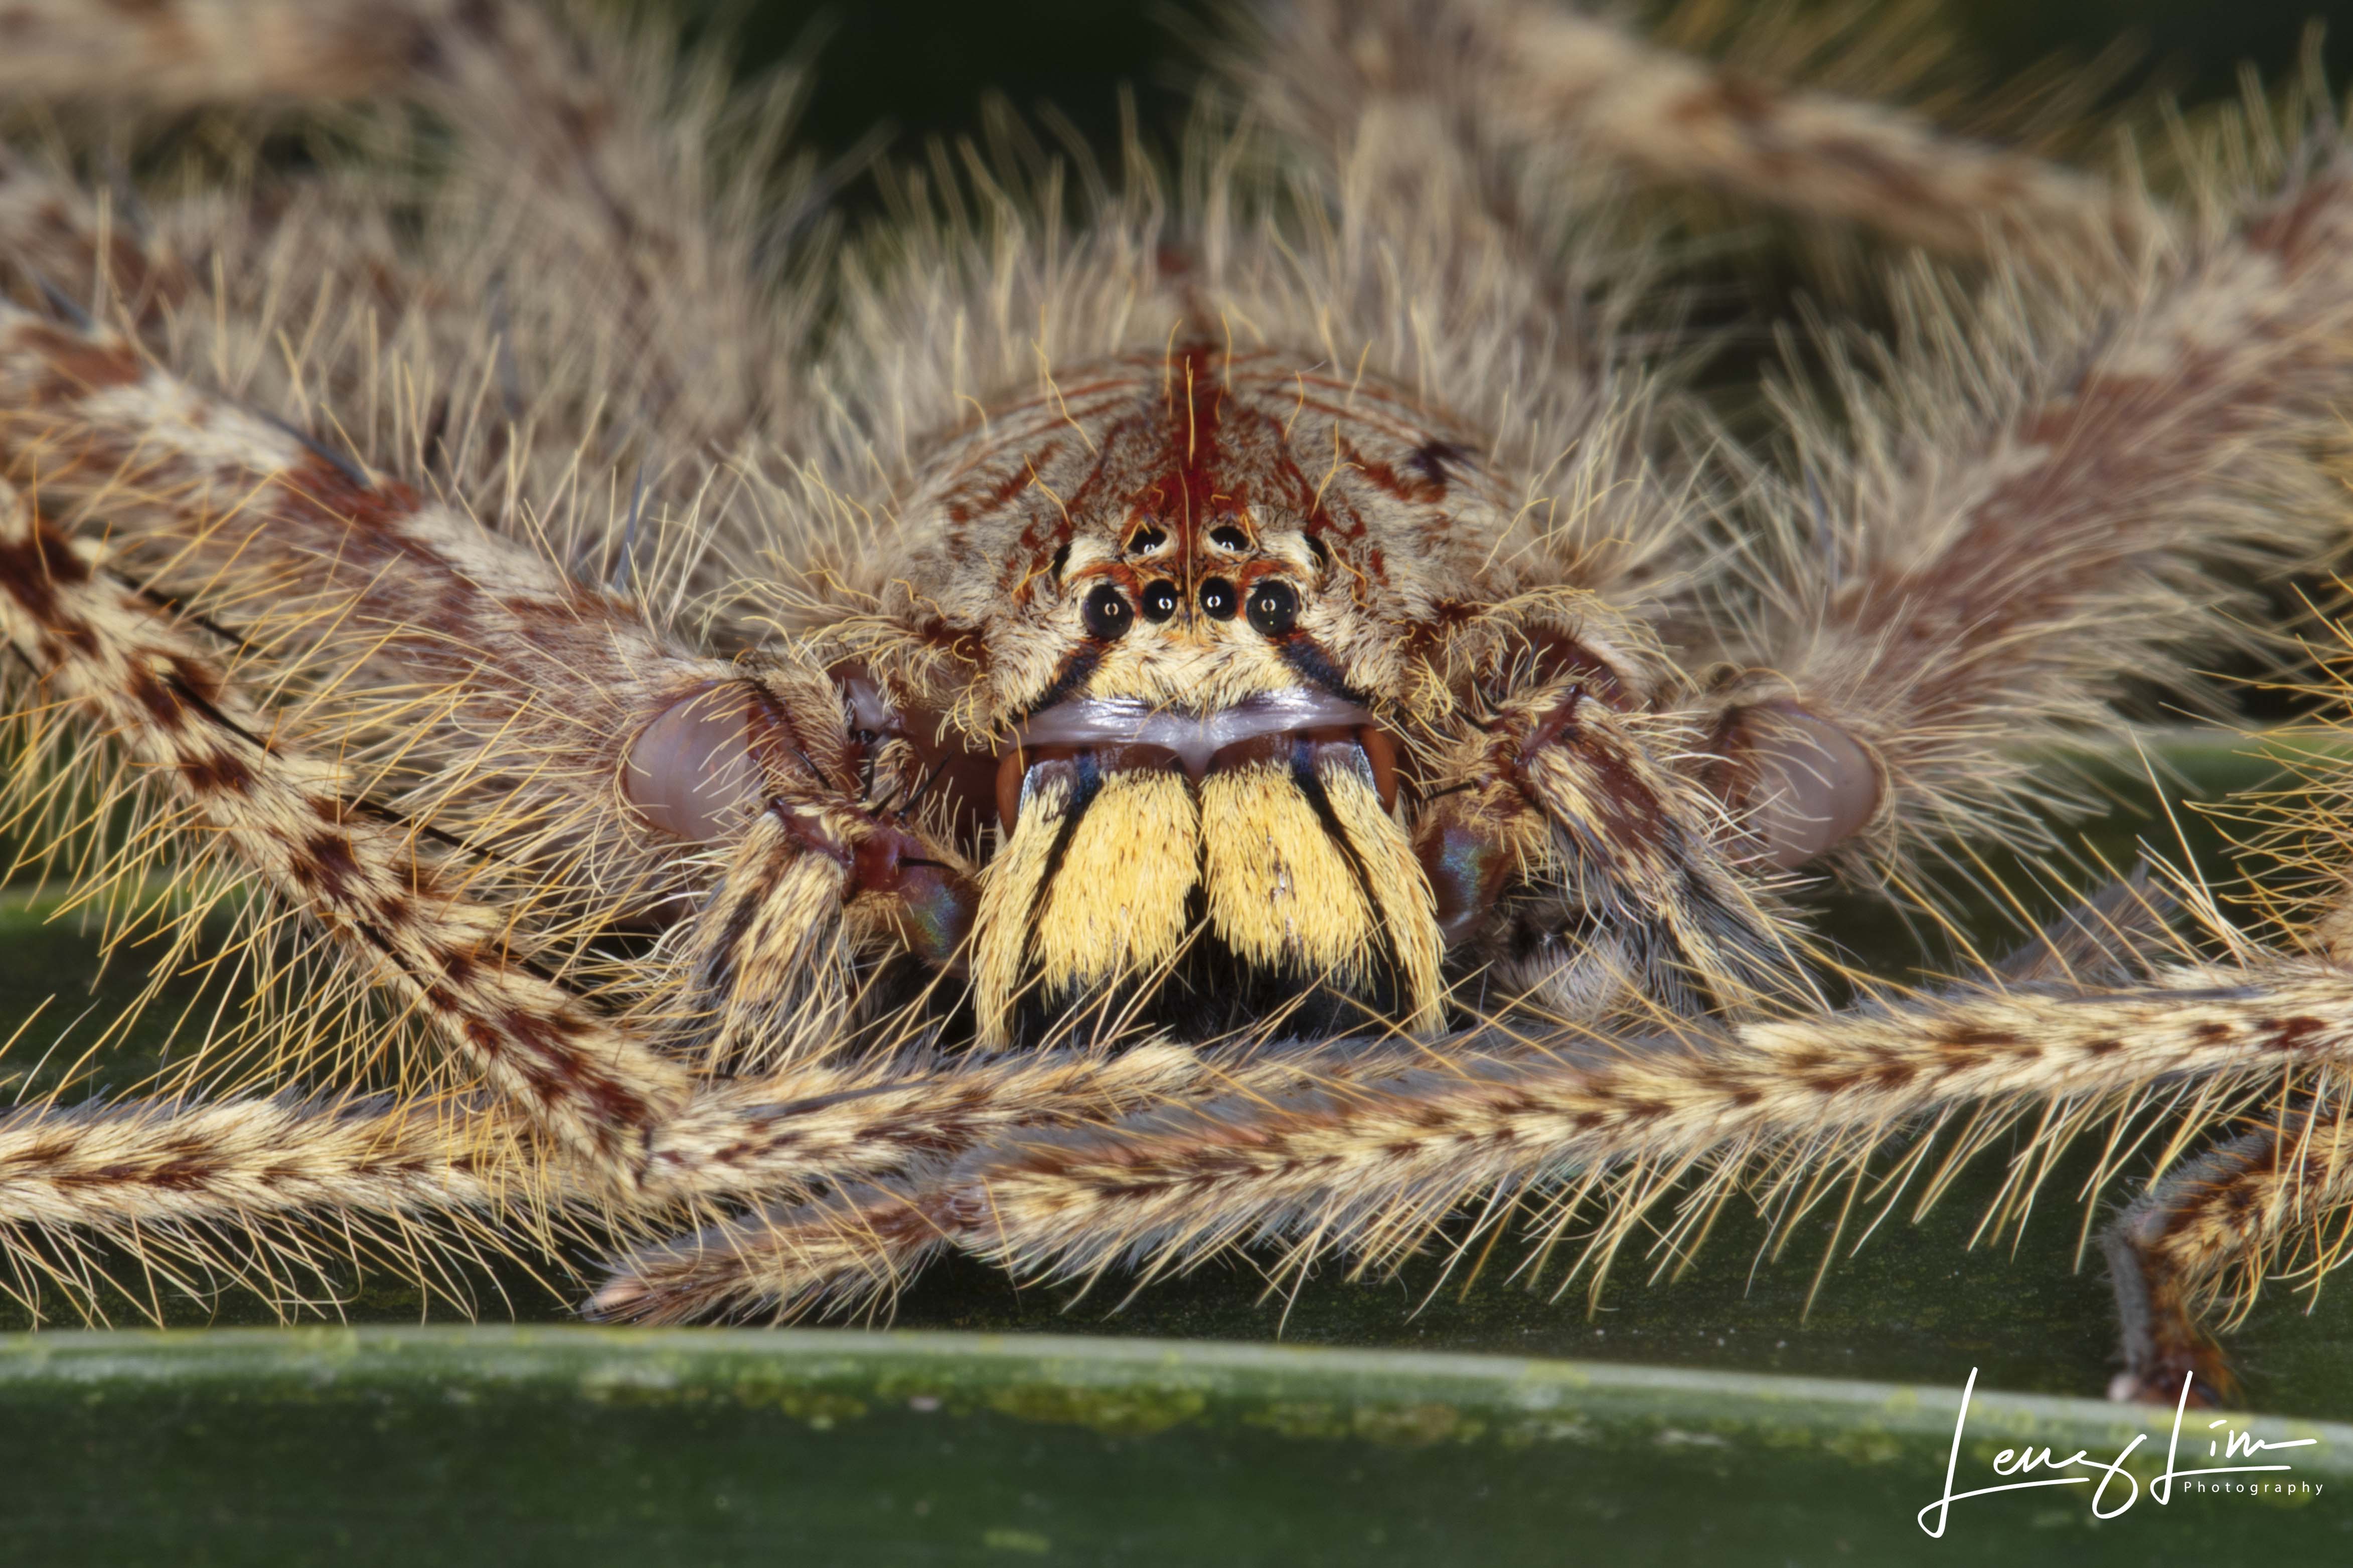
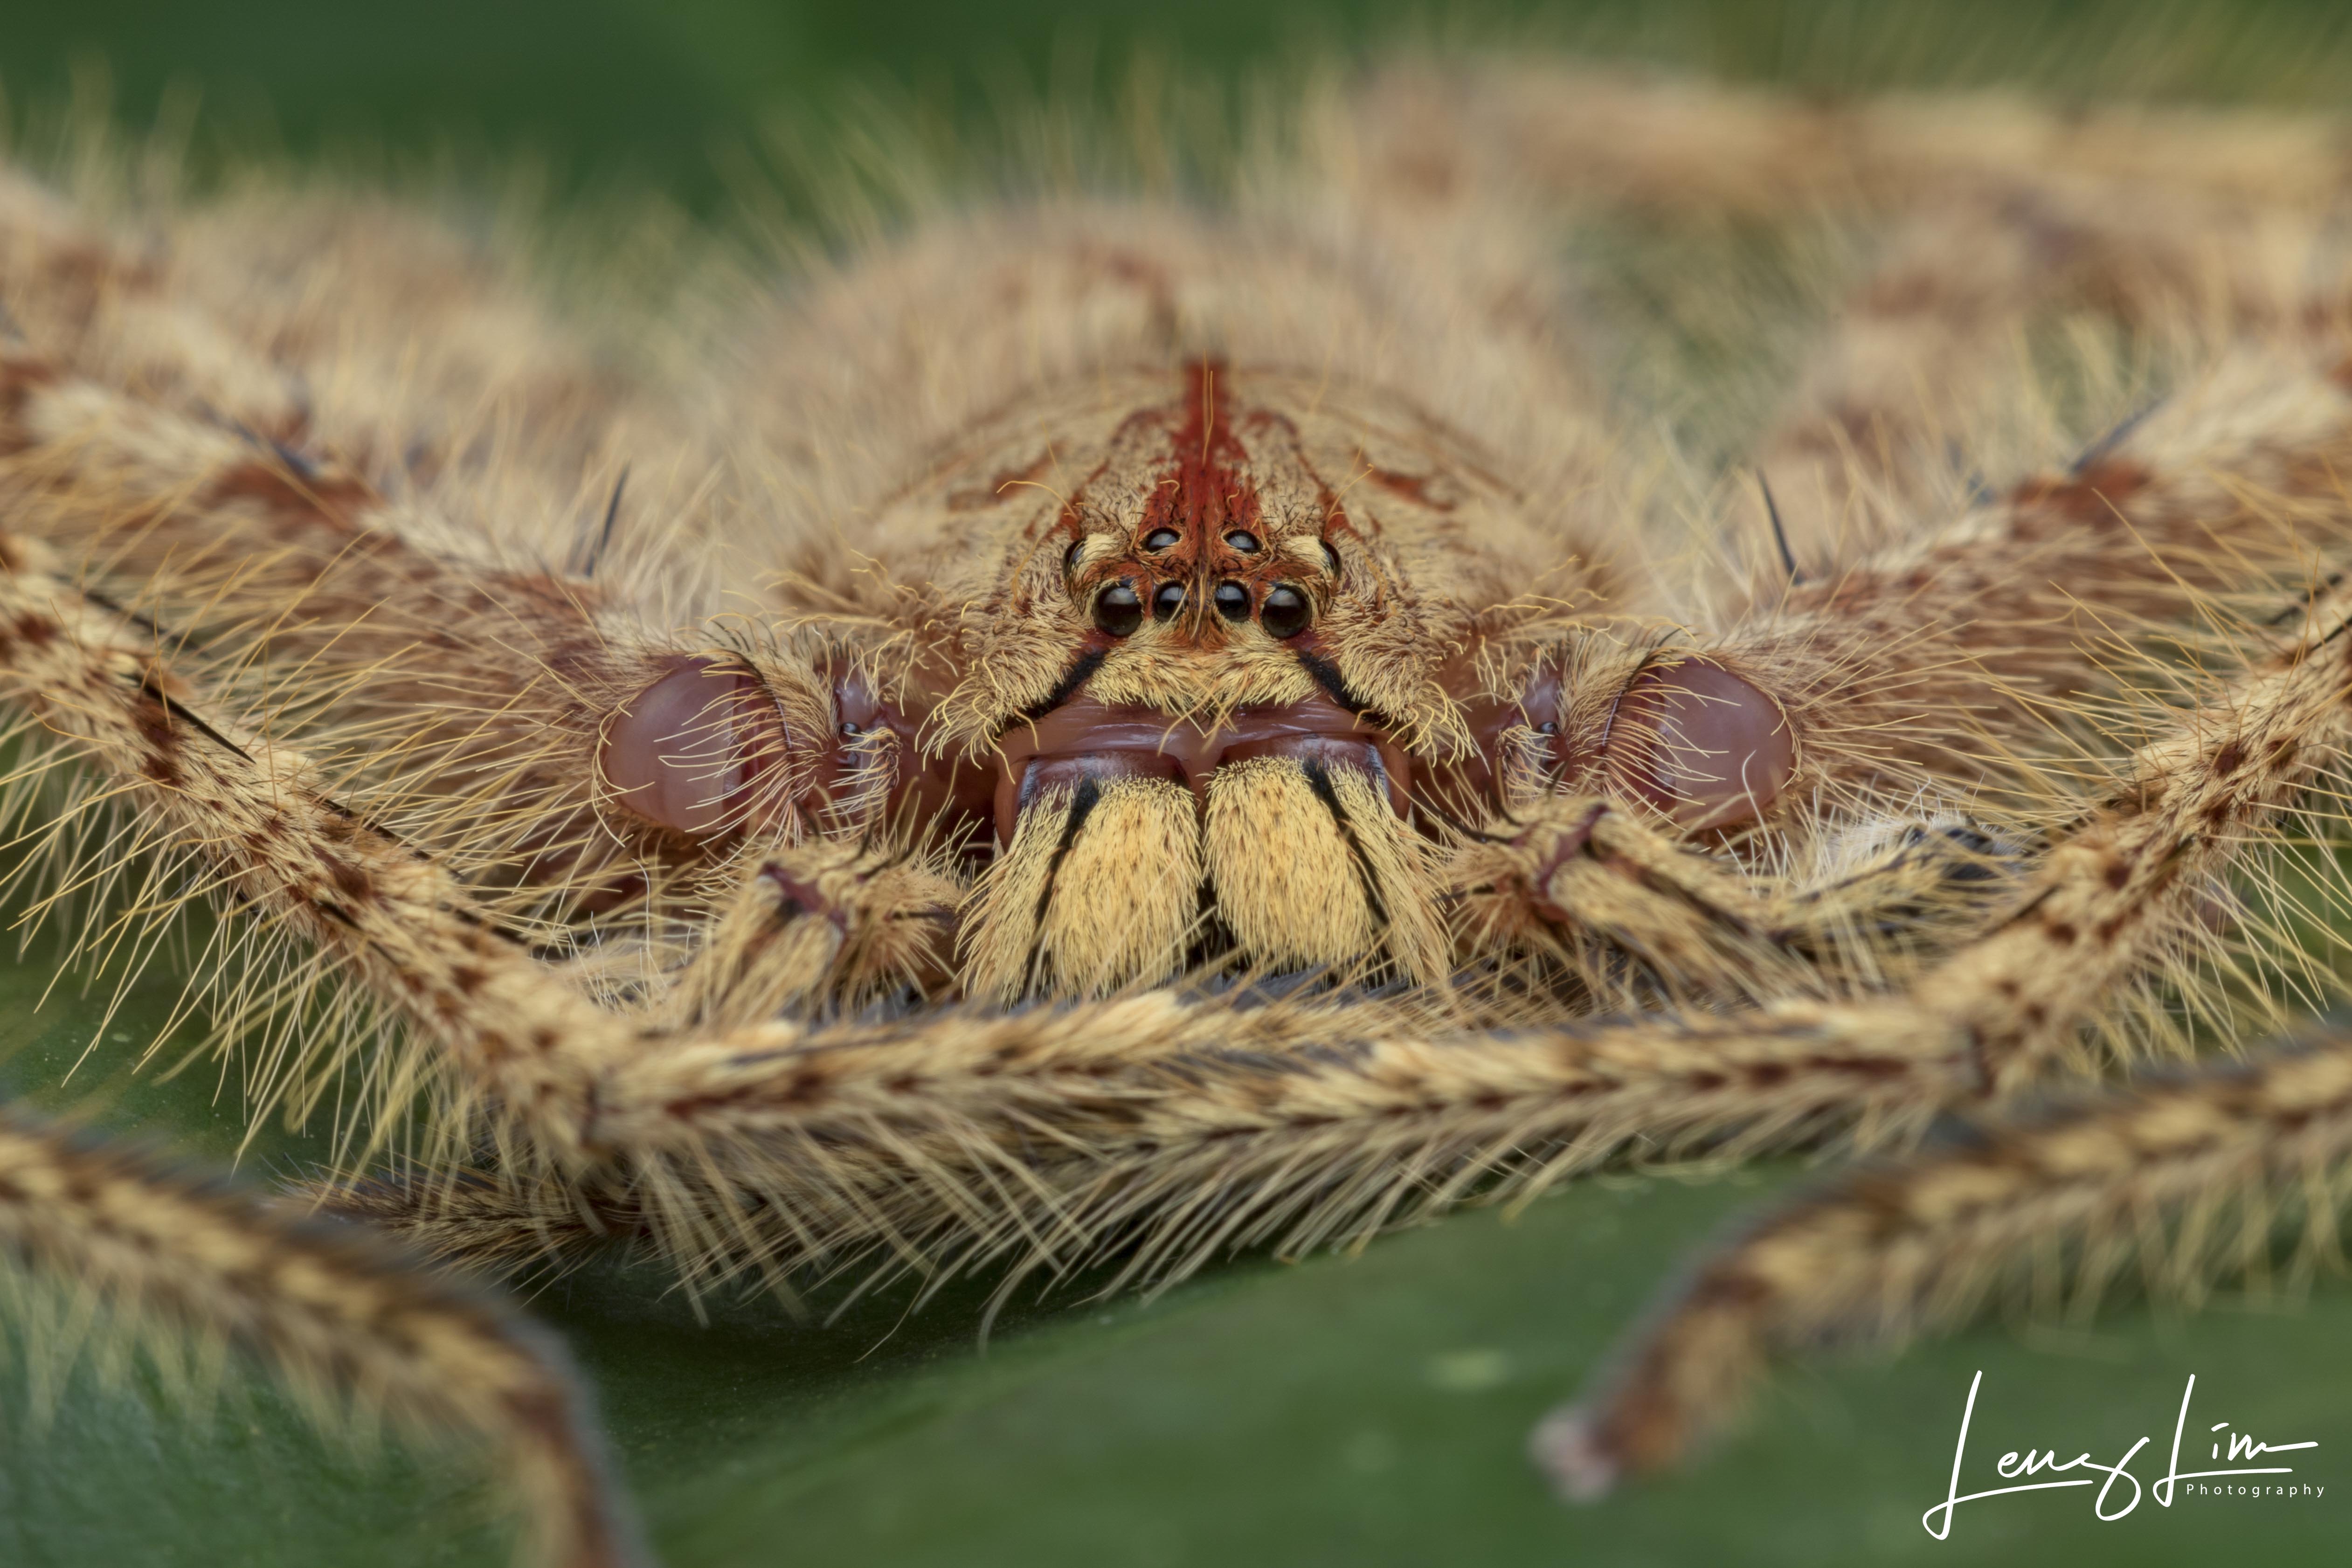
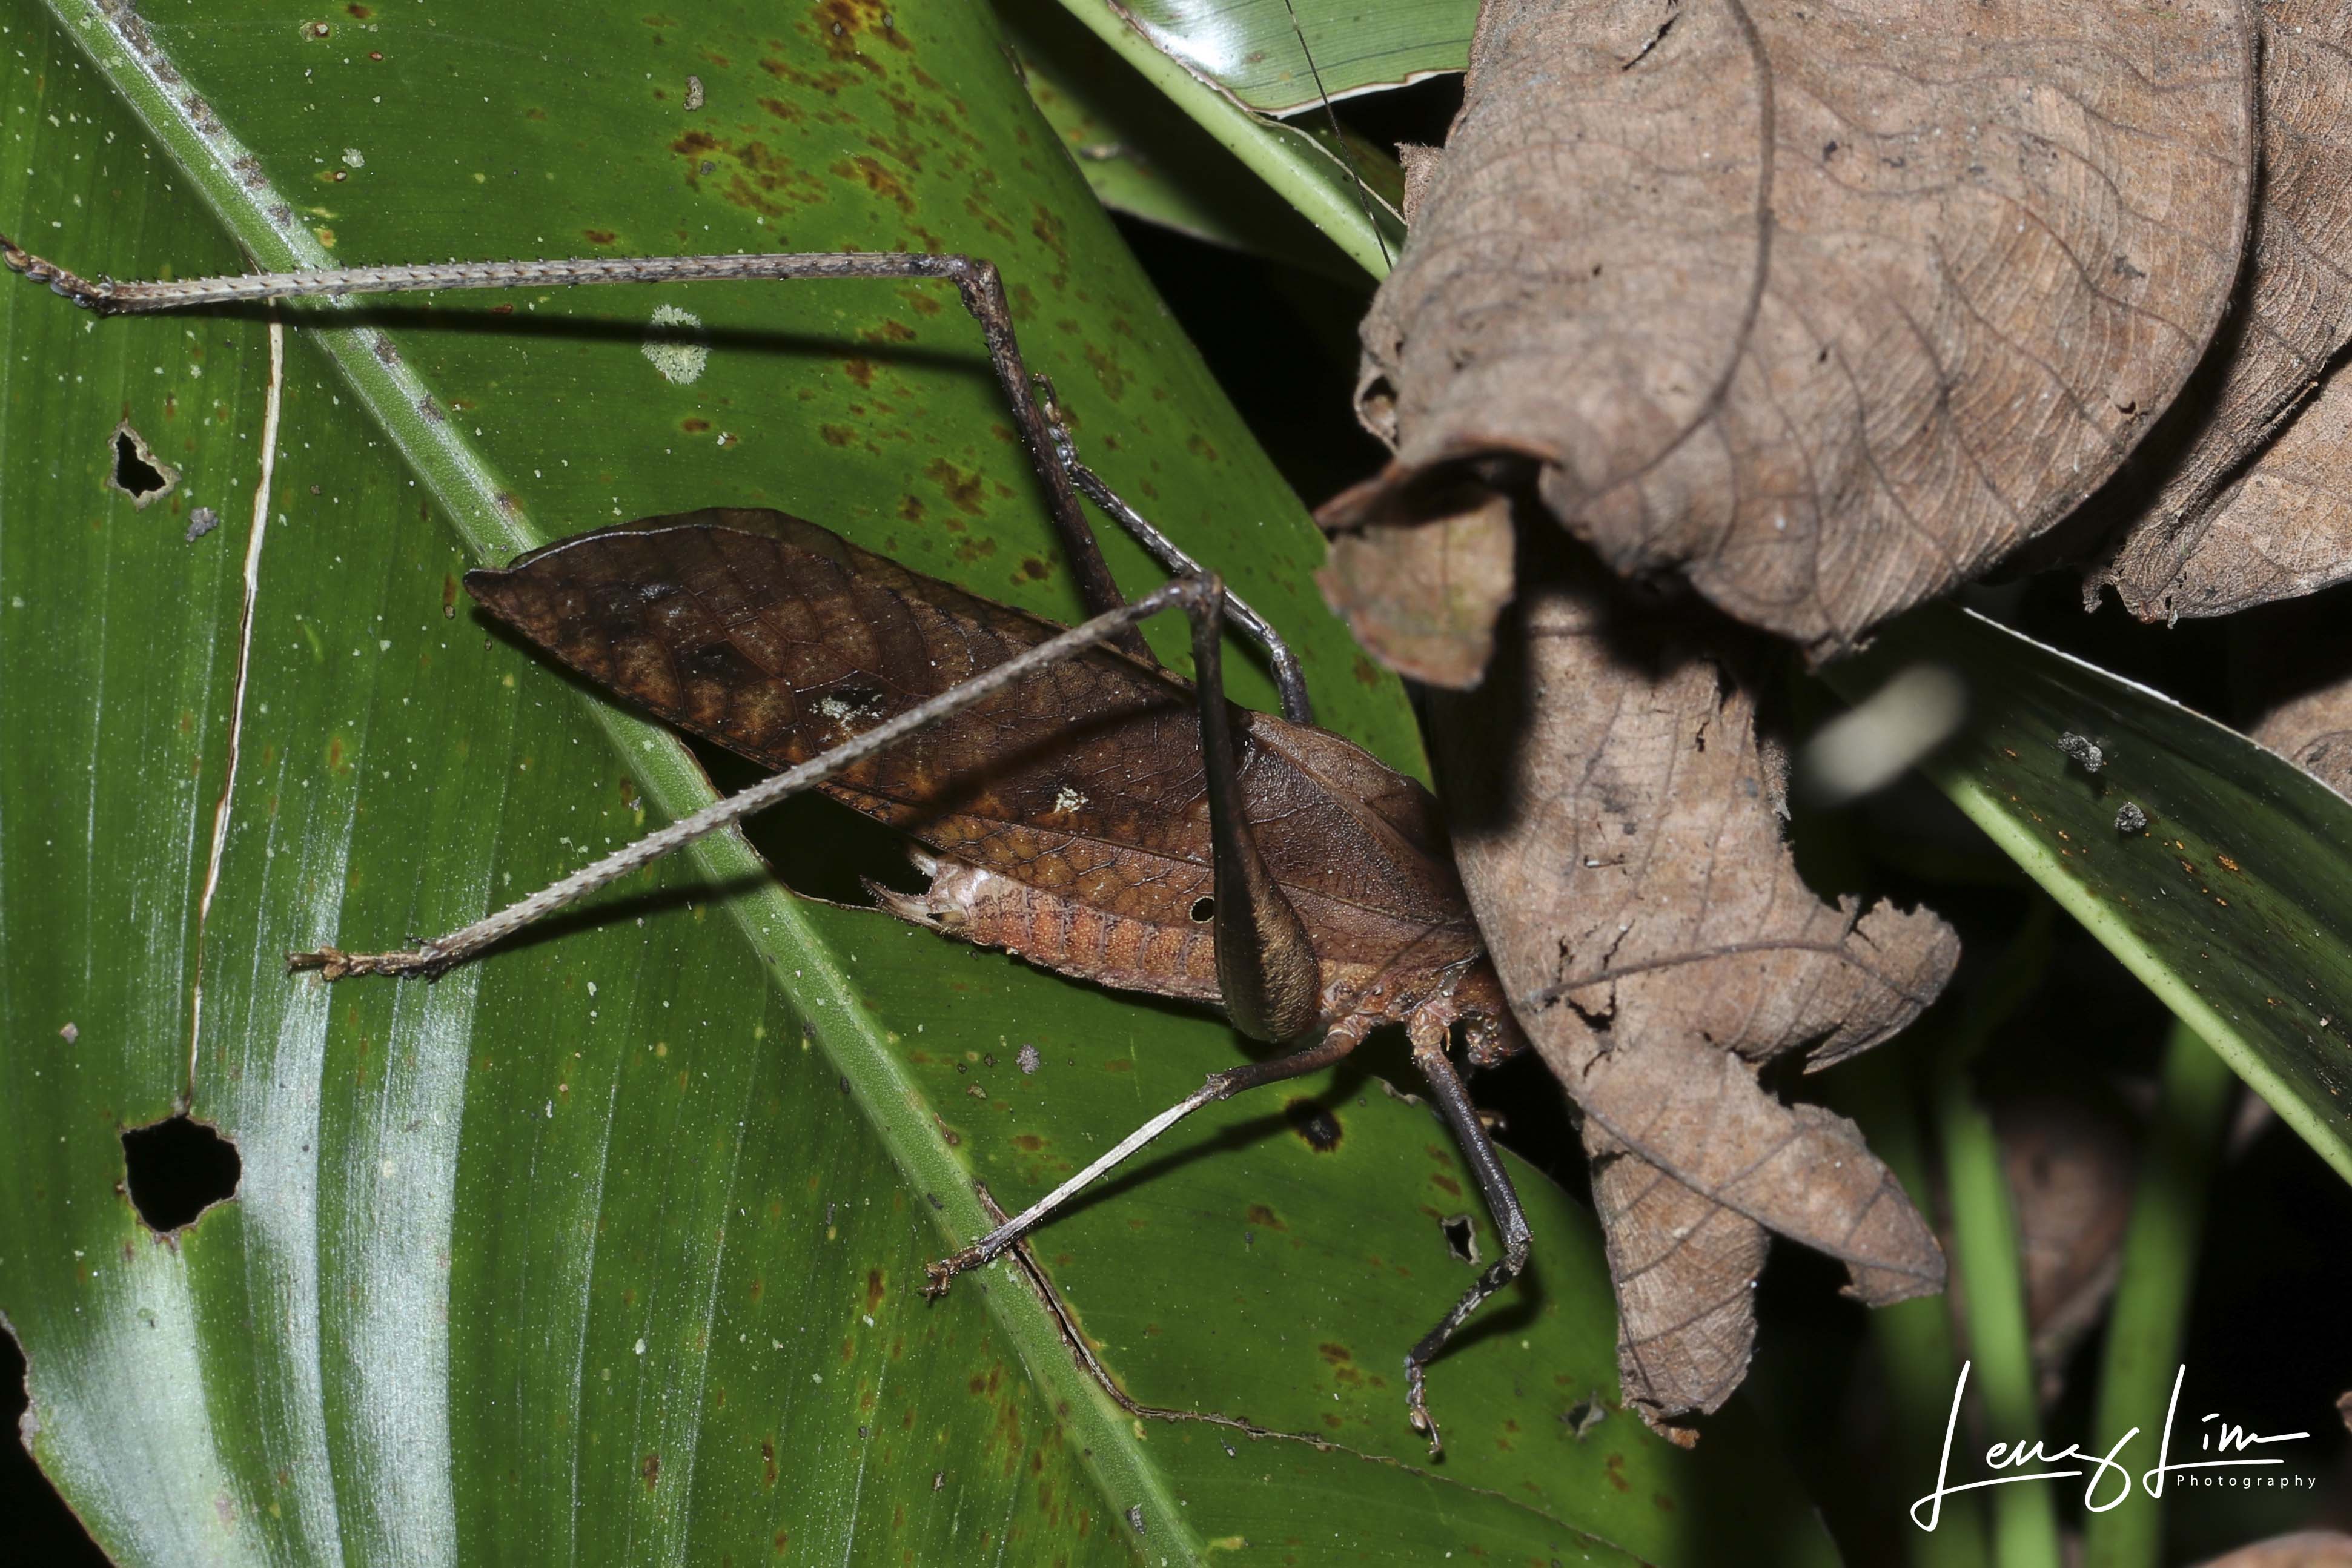
That being said, your light may be soft but specular highlights may still be present in your image and vice versa, Refer to the first image above, to the untrained eye, this seems like a decent macro photo. However, the light is soft but not evenly spread, resulting in a ‘spotlight’ effect in the image. Adding a sizeable diffusion layer will facilitate the spread of light and produce an even lighting. Swipe to see a diffused imaged.
Needless to say, you want soft, diffused light for your macro work.
HOW to design your diffuser

It is useful to think of your final diffusing layer as the light source, not the actual flash head. On a cloudy day, sunlight penetrates layers of translucent clouds and the resultant soft light is ideal for many kinds of photography. The cloud, is your light source. Similarly when using a flash indoors, why do people bounce their light off the white walls/ceilings? Using the same concept, your quality of light is improved as the relative size of your light source has been increased (flash head vs wall/ceiling). The resultant soft light is perfect for indoor portraiture.
With this in mind, you will be able to better design your diffuser in relation to which areas need a bit more light or how you may create more depth in your images.
Here are some Primary factors to consider that are of utmost importance that will get you results almost immediately:
- Directing and Spreading of Light
- Distance from Flash Head
- Layers of Diffusion
- Focus Light
Directing and Spreading of Light
The larger the surface area of your diffusing material, the more even your light will be (recall that this is your light source). Which is why that Pringles Can you are using, simply would not work as the light has too small of a surface area to spread out (resulting in that spotlight effect mentioned earlier). A word of caution is that having a larger surface area of diffusing material would mean an increased size of your diffuser. This affects your shooting when faced with webs, leaves and other branches that may be in the way. Utilise an overall concave shape to allow light to wrap/spread around the subject. Furthermore, by extending the diffusion material downwards next to your lens can assist in reflecting some light to reduce (not eliminate) shadows, although using a separate reflector would work much better for this.
Distance from Flash Head
Use an appropriate distance between the flash head and the diffusion layer. If too close, all you will get is a hotspot in your diffusing material and this can be seen in the reflection of your subject’s eyes. Getting this distance right enables the light to travel and fully spread out evenly across your diffusing material. This can also determine the eventual size of the entire diffuser.
Layers of Diffusion
Note the difference in diffusing your light and cutting/losing your light. The denser your diffusing material, the greater the light loss. Material that is too thin result in hotspots. But use too many layers of material, you will cut out too much light. You just need to find a balance.
Focus Light
A focus light can be a head lamp, a mini torch or whatever works for you. DO NOT belittle the importance of having a powerful focus light, whether you shoot in the night or day. Sufficient ambient light facilitates accurate focusing and metering. It will also reduce the lag in your EVF / Live view. Make sure that your focus light has enough juice to last the entire shoot and enough lumens to illuminate different scenes.
Secondary factors that you can take into consideration will include:
- Light Loss
- Portability
- Weight
- Durability and Weather Proofing
Light Loss
Reflectors like foil or aluminium tape can help with the directing of light. Adopting a more “closed” concept with your diffuser can reduce light loss to the environment. This enables you to lower your flash output which in turn allows quicker recycling speeds for focus-stacking and preserving the longevity of your flash.
Portability
Is your diffuser travel friendly? You may want to come up with a design that can be rolled up or dismantled flat if you are a frequent traveller.
Weight
A factor that affects stamina in the field and one-handed operations.
Durability and Weather Proofing
Strongly dependent on material used. E.g packing foam has good diffusing properties, rain proof, but tears easily.
I personally designed and built numerous diffusers and experimented with a variety of materials along the years just to better suit my workflow as well as to accommodate any changes to my equipment. So don’t be afraid to keep improving on your diffuser by changing the design or experimenting with other material.
With all this in mind, you should already be able to build a diffuser that can get you fantastic results. Inexpensive materials can be sourced from DIY/Art&Craft/Daiso shops and even online.

FLASH UNITS
Depending on the kind of flash you are using, speedlites, ring flashes, wireless flashes etc, it will affect how you diffuse your light and ultimately, how your images will look. You don’t even need to spend hundreds of dollars on a flash, I spent a good year using a $25 fully manual Neewer flash for macro work until I really needed certain functions (rear curtain sync etc).
Speedlites


Making your diffuser shouldn’t be complicated especially if you are using standard speedlites. Modify your diffuser as you go. It can be as simple as the one shown in the images above and you will get good results.

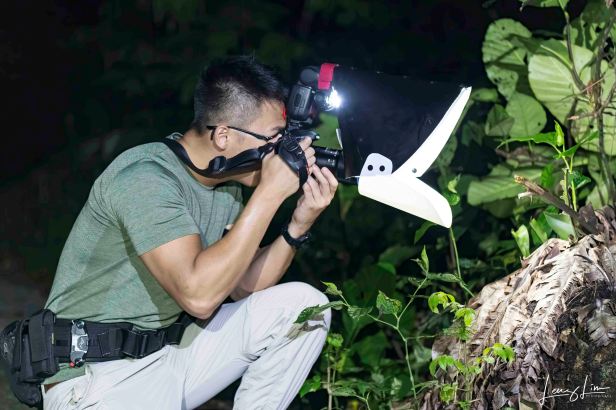
Needless to say, speedlites are the most popular kind of flash and for good reason. These flashes pack a punch with the generally high output (high GN number) and simply just sit on your camera’s hotshoe. With a set up like this, your light only travels in one general direction and there’s nothing much you need to think about besides flash output and getting your settings right. Having an overall large, concave shape will give you light that is evenly spread and wrapped around your subject. The light reflected off your subjects (e.g Jumping Spiders) will look very natural and it is much desired.

Note the reflection in the eyes of the subject
Ring flashes
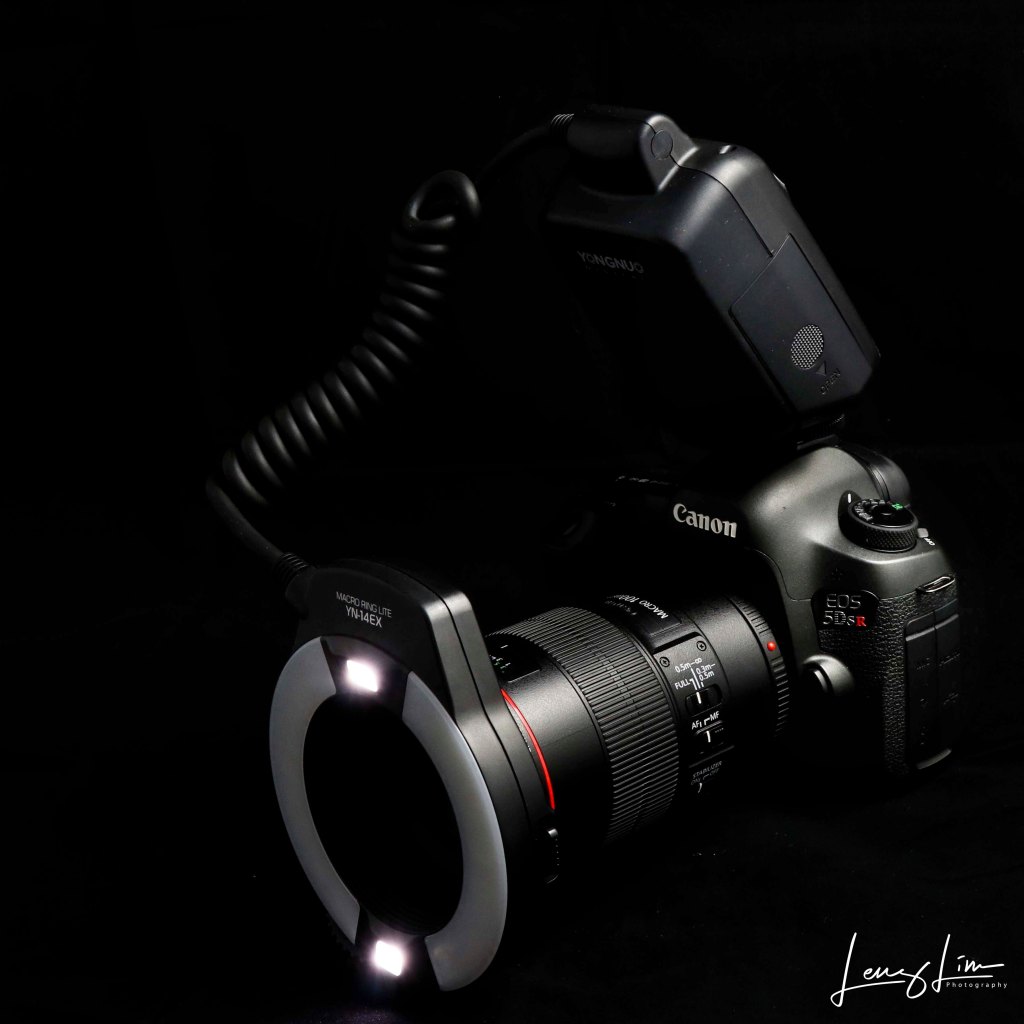
I tend to stay away from ring flashes due to the complexity of designing the diffuser as the flashes are simply too close to the subject. These flashes emit light around the lens and you simply will not have enough surface area for the light to spread. Furthermore, the reflection of the ring flashes in your subjects eyes are not exactly desirable.

Wired/Wireless off-camera flashes

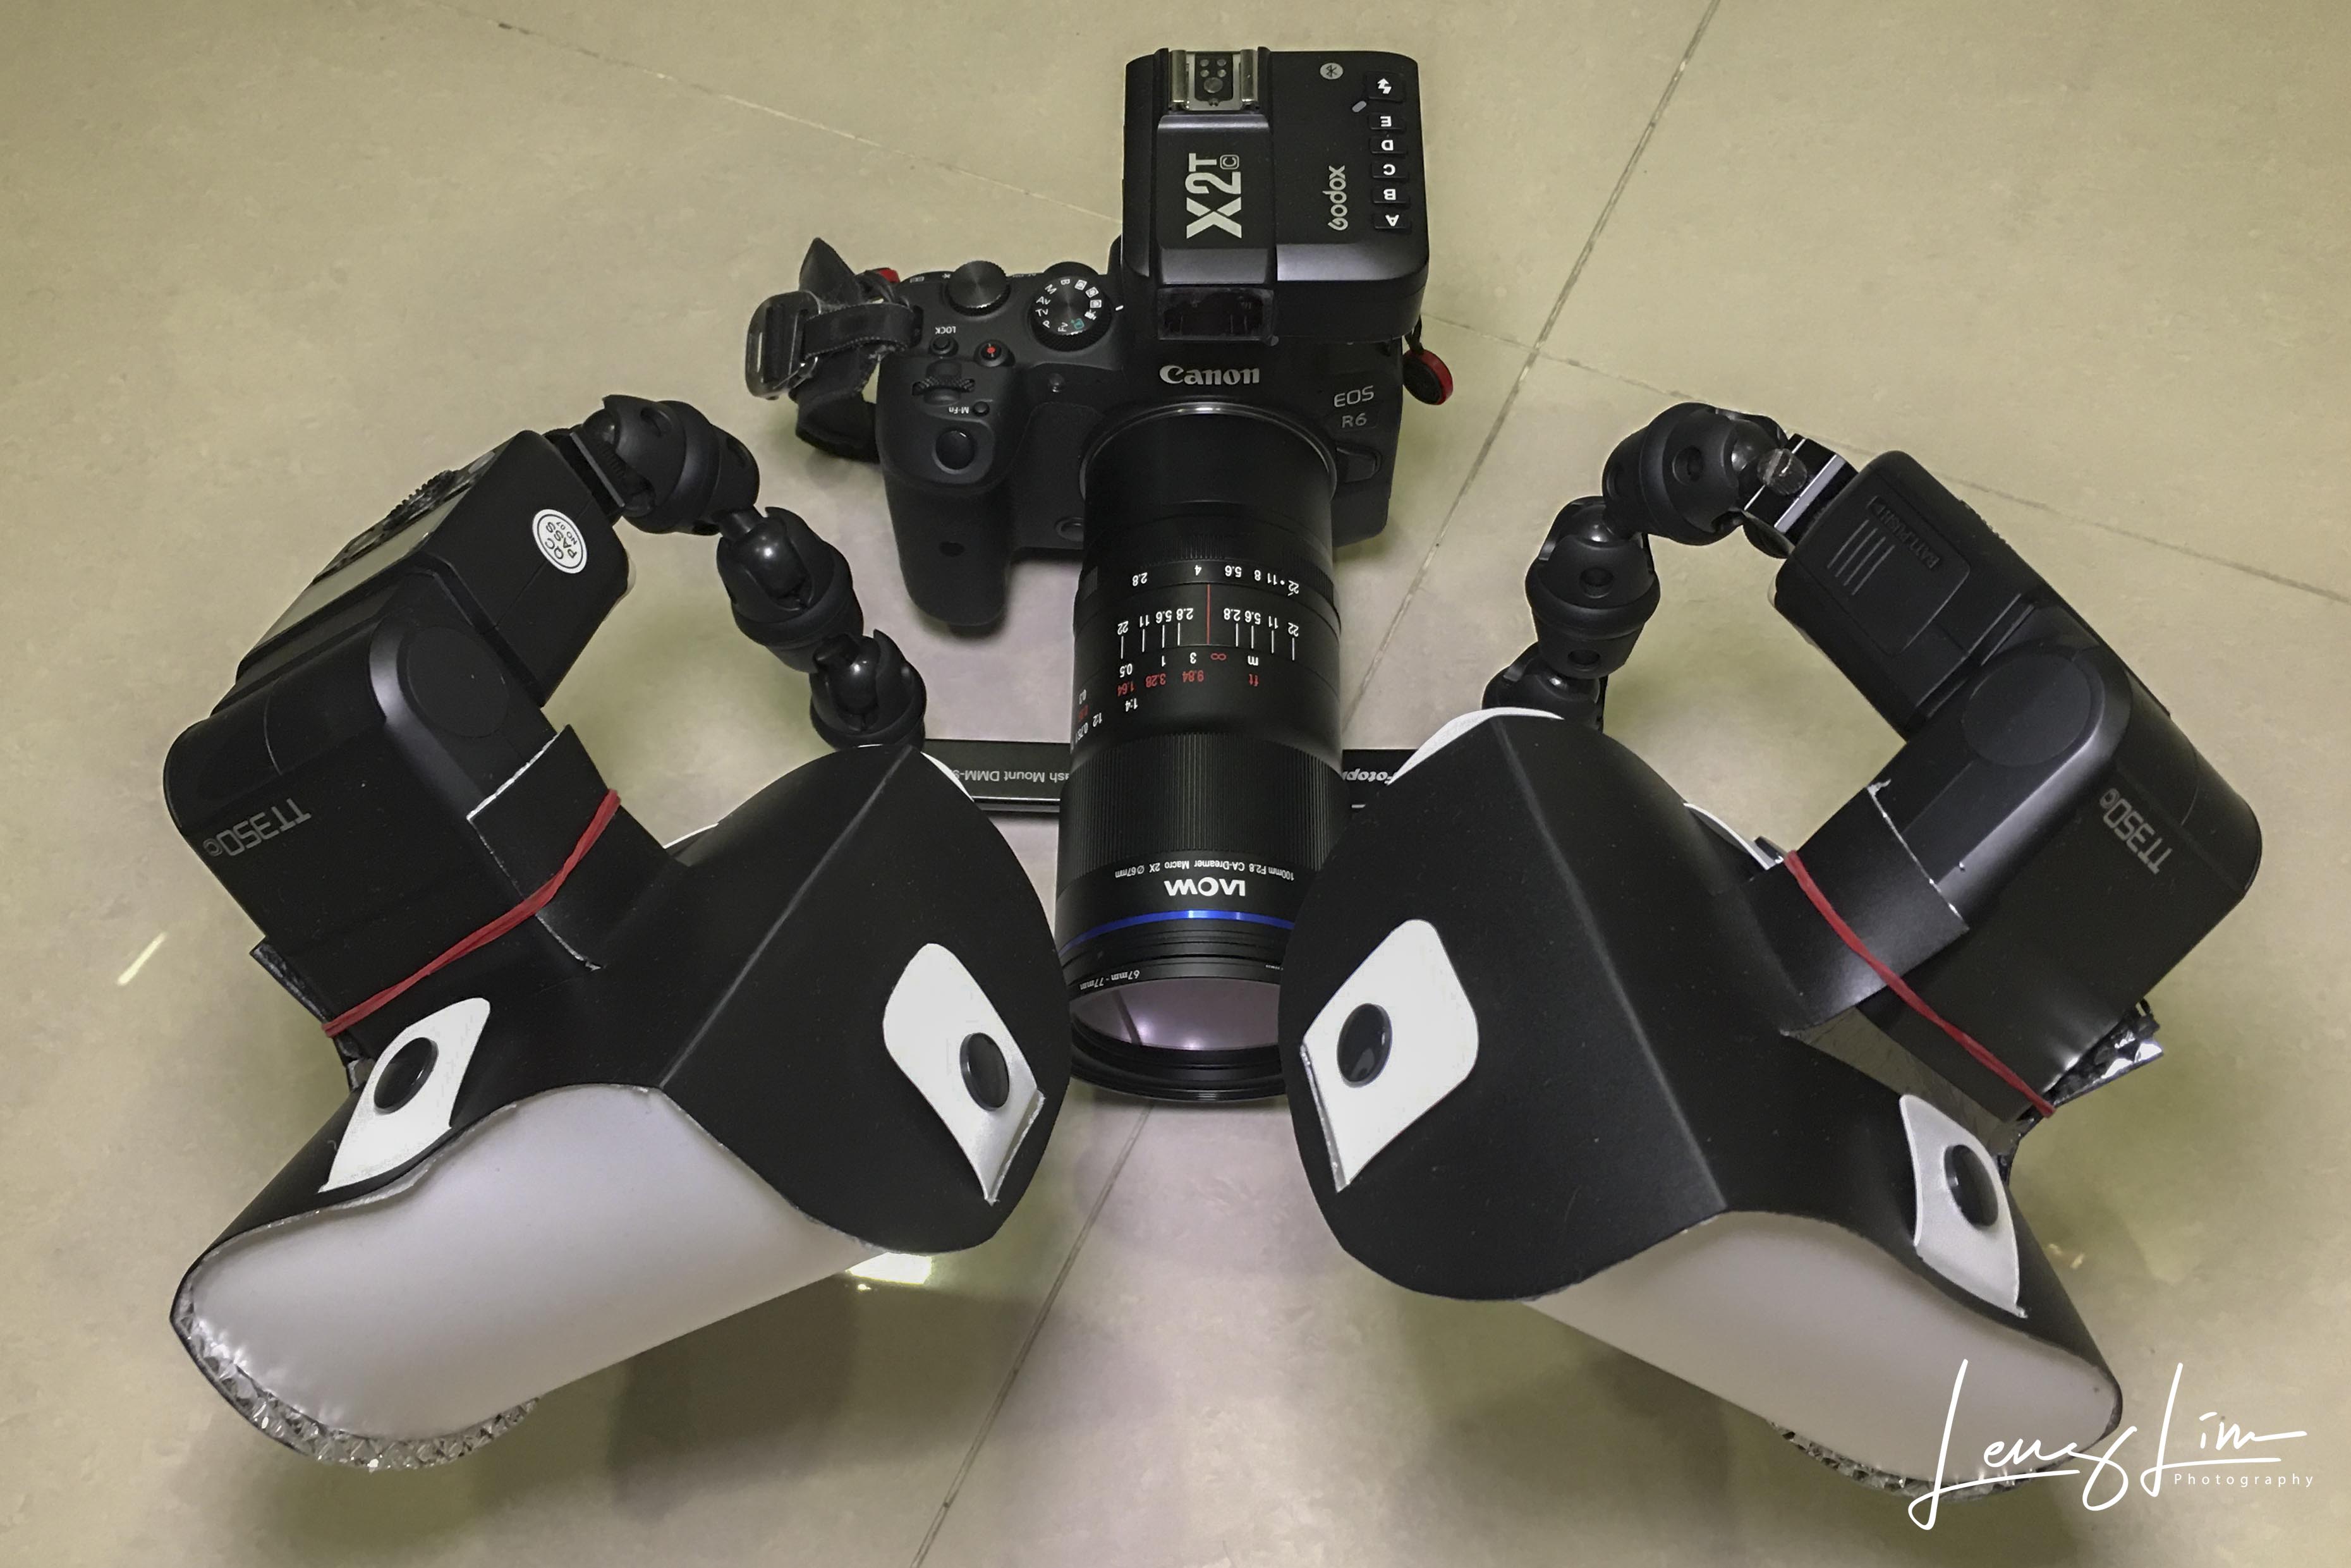

Off camera flashes give you way more control over your lighting and access to hard-to-reach areas or weird angles. It will be beneficial if you understand 3 (or 4) point lighting (usually taught in portraiture) to achieve certain results. Subjects will look more 3D with the resultant engraving effect whereas images can look flat and boring with one directional lighting (usually from a simple speedlite diffuser). However, I would not recommend beginners or amateurs to utilise off camera flashes until they get their techniques and basics right. With off-camera flashes you will have more to think about and it won’t be as simple as using a standard speedlite system.
Pairing your flashes with articulating arms can give you more directional freedom and access to certain areas previously impossible with a large speedlite diffuser.
Testing diffusion
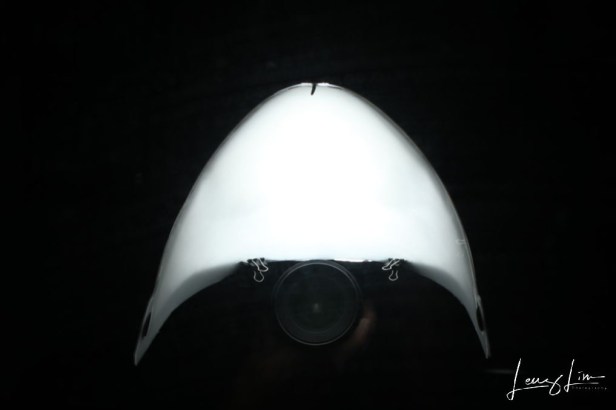
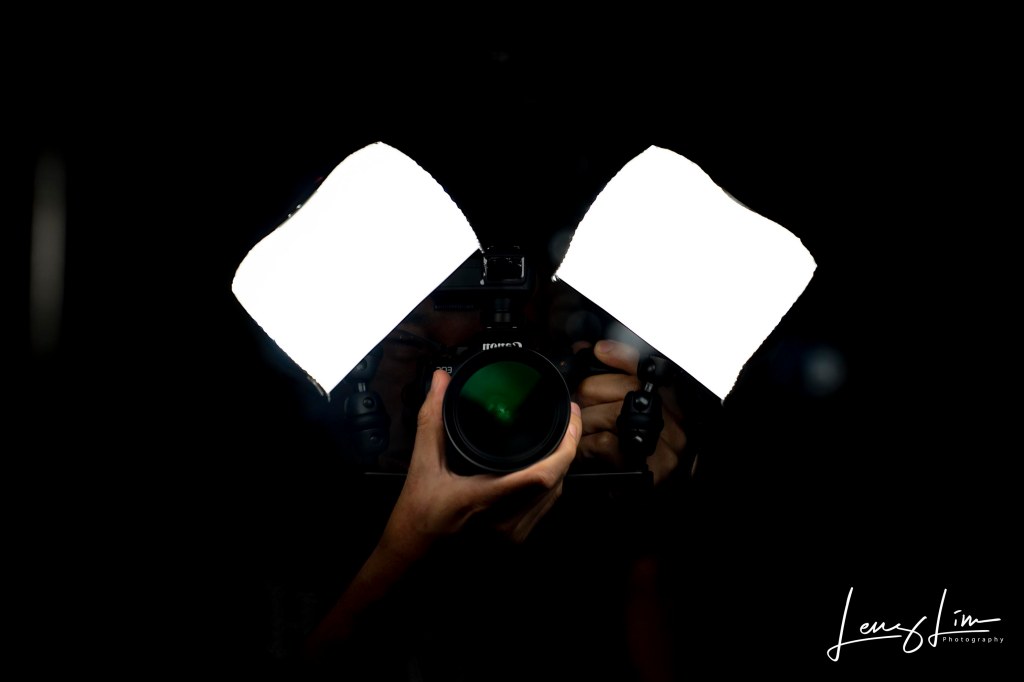
The best way to do this is simply by photographing yourself in the mirror holding up your set-up. By doing so you are able to see exactly how your light is spread across your material and basically identify any hotspots.
You may also experiment with glossy, reflective subjects and play around with reflectors for better lighting.


There you go, let those creative juices flow. With properly lit macro images, your work will stand out amongst the rest. Should you need advice/consultation on your designs or gear recommendations, do contact me here or on my Instagram page.
If you like this guide to diffusion or found it helpful, do remember to like/comment/share this article and feel free to ask me any questions. I am also open to taking in requests for other tutorials, gear reviews or any other content.

Thank you for very informative article.
Just one comment for Testing diffusion. On both small images the diffuser area seem completely white. I think that the light coming from diffuser is too good (too even) to be true. I guess the whole area of diffuser is overexposed so the differences between center and corners cannot be seen.
I tried this method with my Olympus OM-D camera, small flash (Meike Mk320) and home made concave diffuser (polyetylene foam 8mm thick). I was surprised that to see some difference (i.e. not to have the diffuser completely white) I need lowest ISO (100), highest F-stop (22) and lowest manual output of the flash 1/128.
LikeLike
The point of testing your diffusion using the mirror is purely just to see which parts have lesser lighting than others, ie. to identify severe hotspots that may appear in the eyes of your subjects (mostly salticids). I personally am not too worried about the corners as impact is low, and reflectors should be part of your workflow if situation requires. I did not deliberately overexpose anything, the settings were simply the exact exposure settings i use 95% of the time which is 1/125, f/11, ISO 100. flash output was at its lowest, any higher, you will see the glares in the mirror. 8mm is also crazy thick to be used as diffusion material, u want to spread the light, not cut it, i personally use material that is ~3mm thick only
LikeLike
> … ie. to identify severe hotspots that may appear in the eyes of your subjects
Ok, then. I misunderstod the point of taking the picture of the diffuser. I thought the prime purpose is to compare how much light is emitted by different parts of the diffuser.
> … I did not deliberately overexpose anything,
Are you sure that the white area of the diffuser at the pictures is not overexposed? On both of your pictures the surfaces seem very evenly lit.
Better with an example. Here https://wayan.smugmug.com/2021/Diffuser-experiments-II/n-XffFZ8/ are two pictures of the unfished prototype of my concave diffuser. On the first picture it seems that the ligt coming from diffuser is very evenly split, i.e. all parts of diffuser produce approximately same amount of light. Only a heavy underexposure (second example] shows that the center of the diffuser produces far more light than the corners.
LikeLike
Thank you for the information. As a beginning/returning student of macro, your information is very clear and to the point.
LikeLike
Thank you this was a great article with on point images examples. One matter wasn’t discussed was the distance between the edge of the lens and the diffuser. The kind of diffuser (AK) that has a white layer surrounding the lens. How close to the lens edge should it be?
LikeLike
Thank you for the comment. It wasn’t discussed because not everybody uses the same macro lens. Some have a very very short minimal focusing distance well some others have a more usable range to work with. Nonetheless, the distance you are asking about isn’t important, or rather the impact is low. You should be finding a balance between size of the diffuser and the power output of your flash. Depending on how well the light spreads based on the material you use, play around with the distance between the material and the flash head to reduce hotspots and to spread light better. As always, the number rule to follow is that the bigger / glossier your subject is, the larger spread of light you need.
LikeLike
That’s great then! Thank you for being so helpful and informative. I’ll be visiting your blog posts.
LikeLike