
This article serves as a user review of the Laowa 15mm Wide-angle Macro lens and a tutorial on wide angle macro photography.
Disclaimer: Locations would not be disclosed to protect the arthropods from poaching.
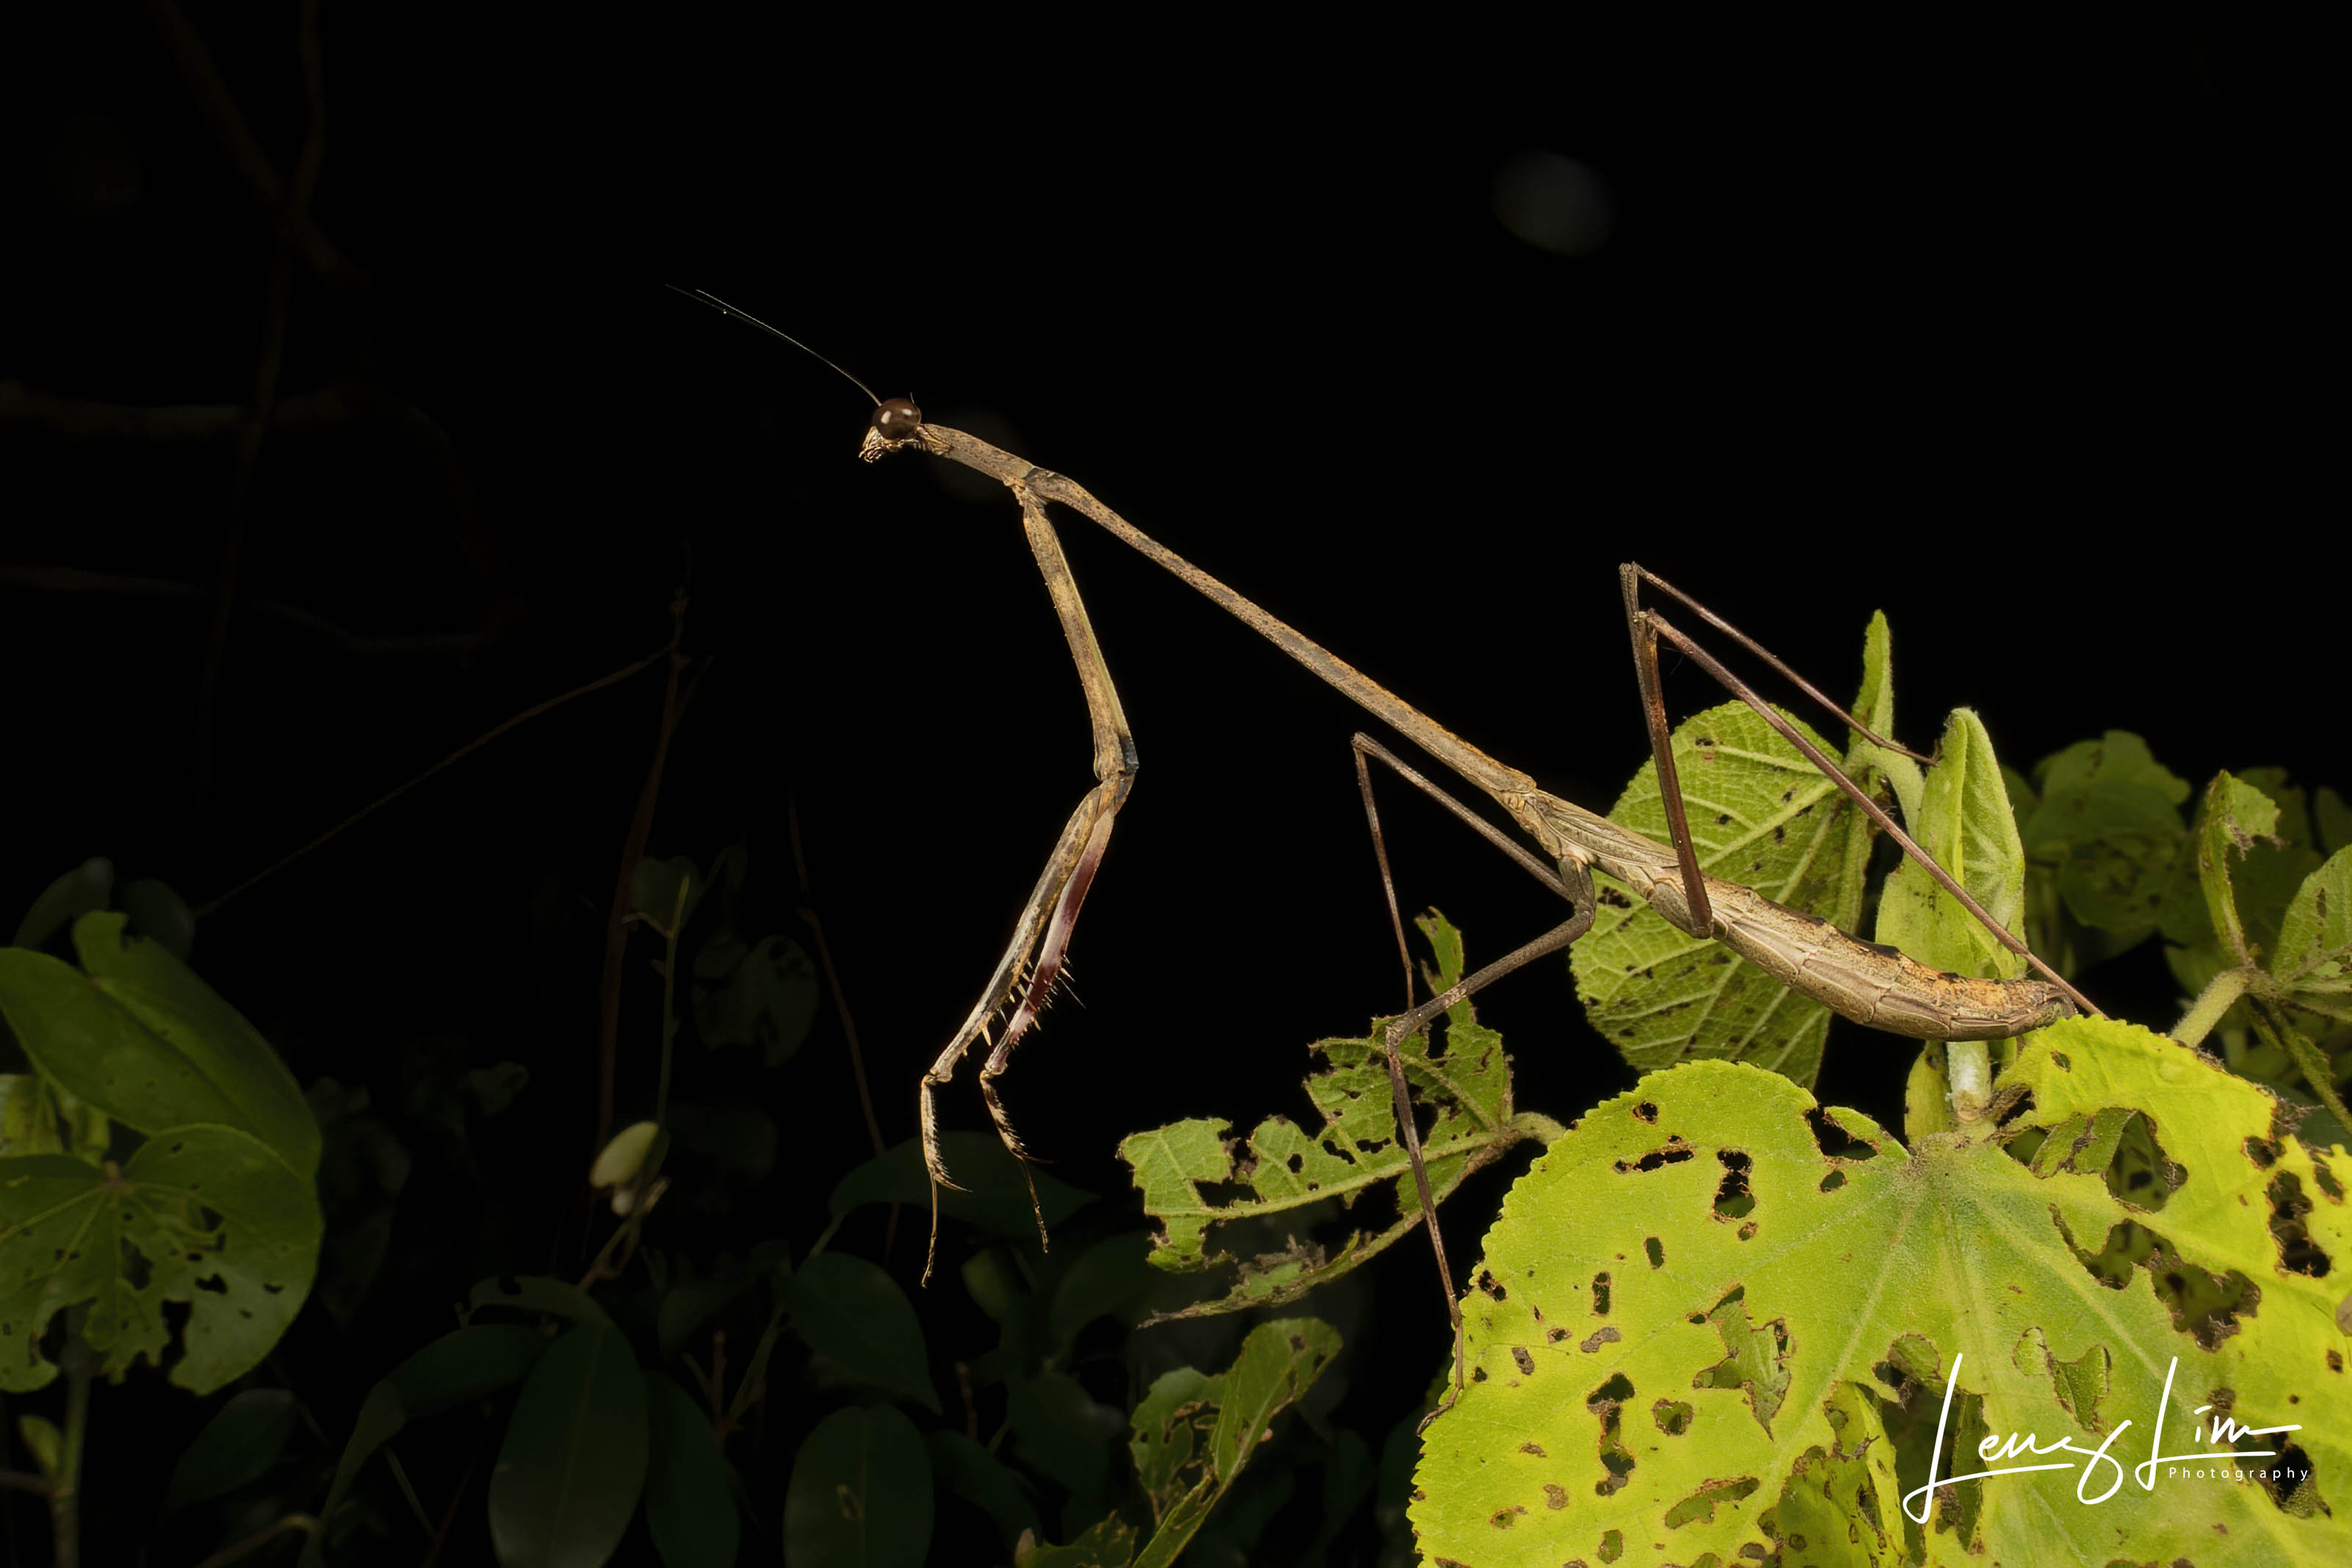
Giraffe Mantis (Euchomenella sp.)
1/125s, ISO 200, f/16
Through my many years of photographing the natural world, the dilemma in composition always ‘bugged’ me. Pun intended. Macro photography is so much more than just highly magnified, detailed images of invertebrates. Yes, these images undoubtedly get you the most attention on social media and the likes/shares eventually constrain, or rather ‘motivate’ you to recreate the same type of images. Don’t get me wrong, it takes loads of practice and technical expertise to achieve those images, but here is the caveat, these images hardly tell any story.
Similarly in wildlife photography, many birders simply chase maximum subject isolation and believe that getting a close-up of that bird on an open perch with an absolutely clean background equates to getting a great image. But is it really?
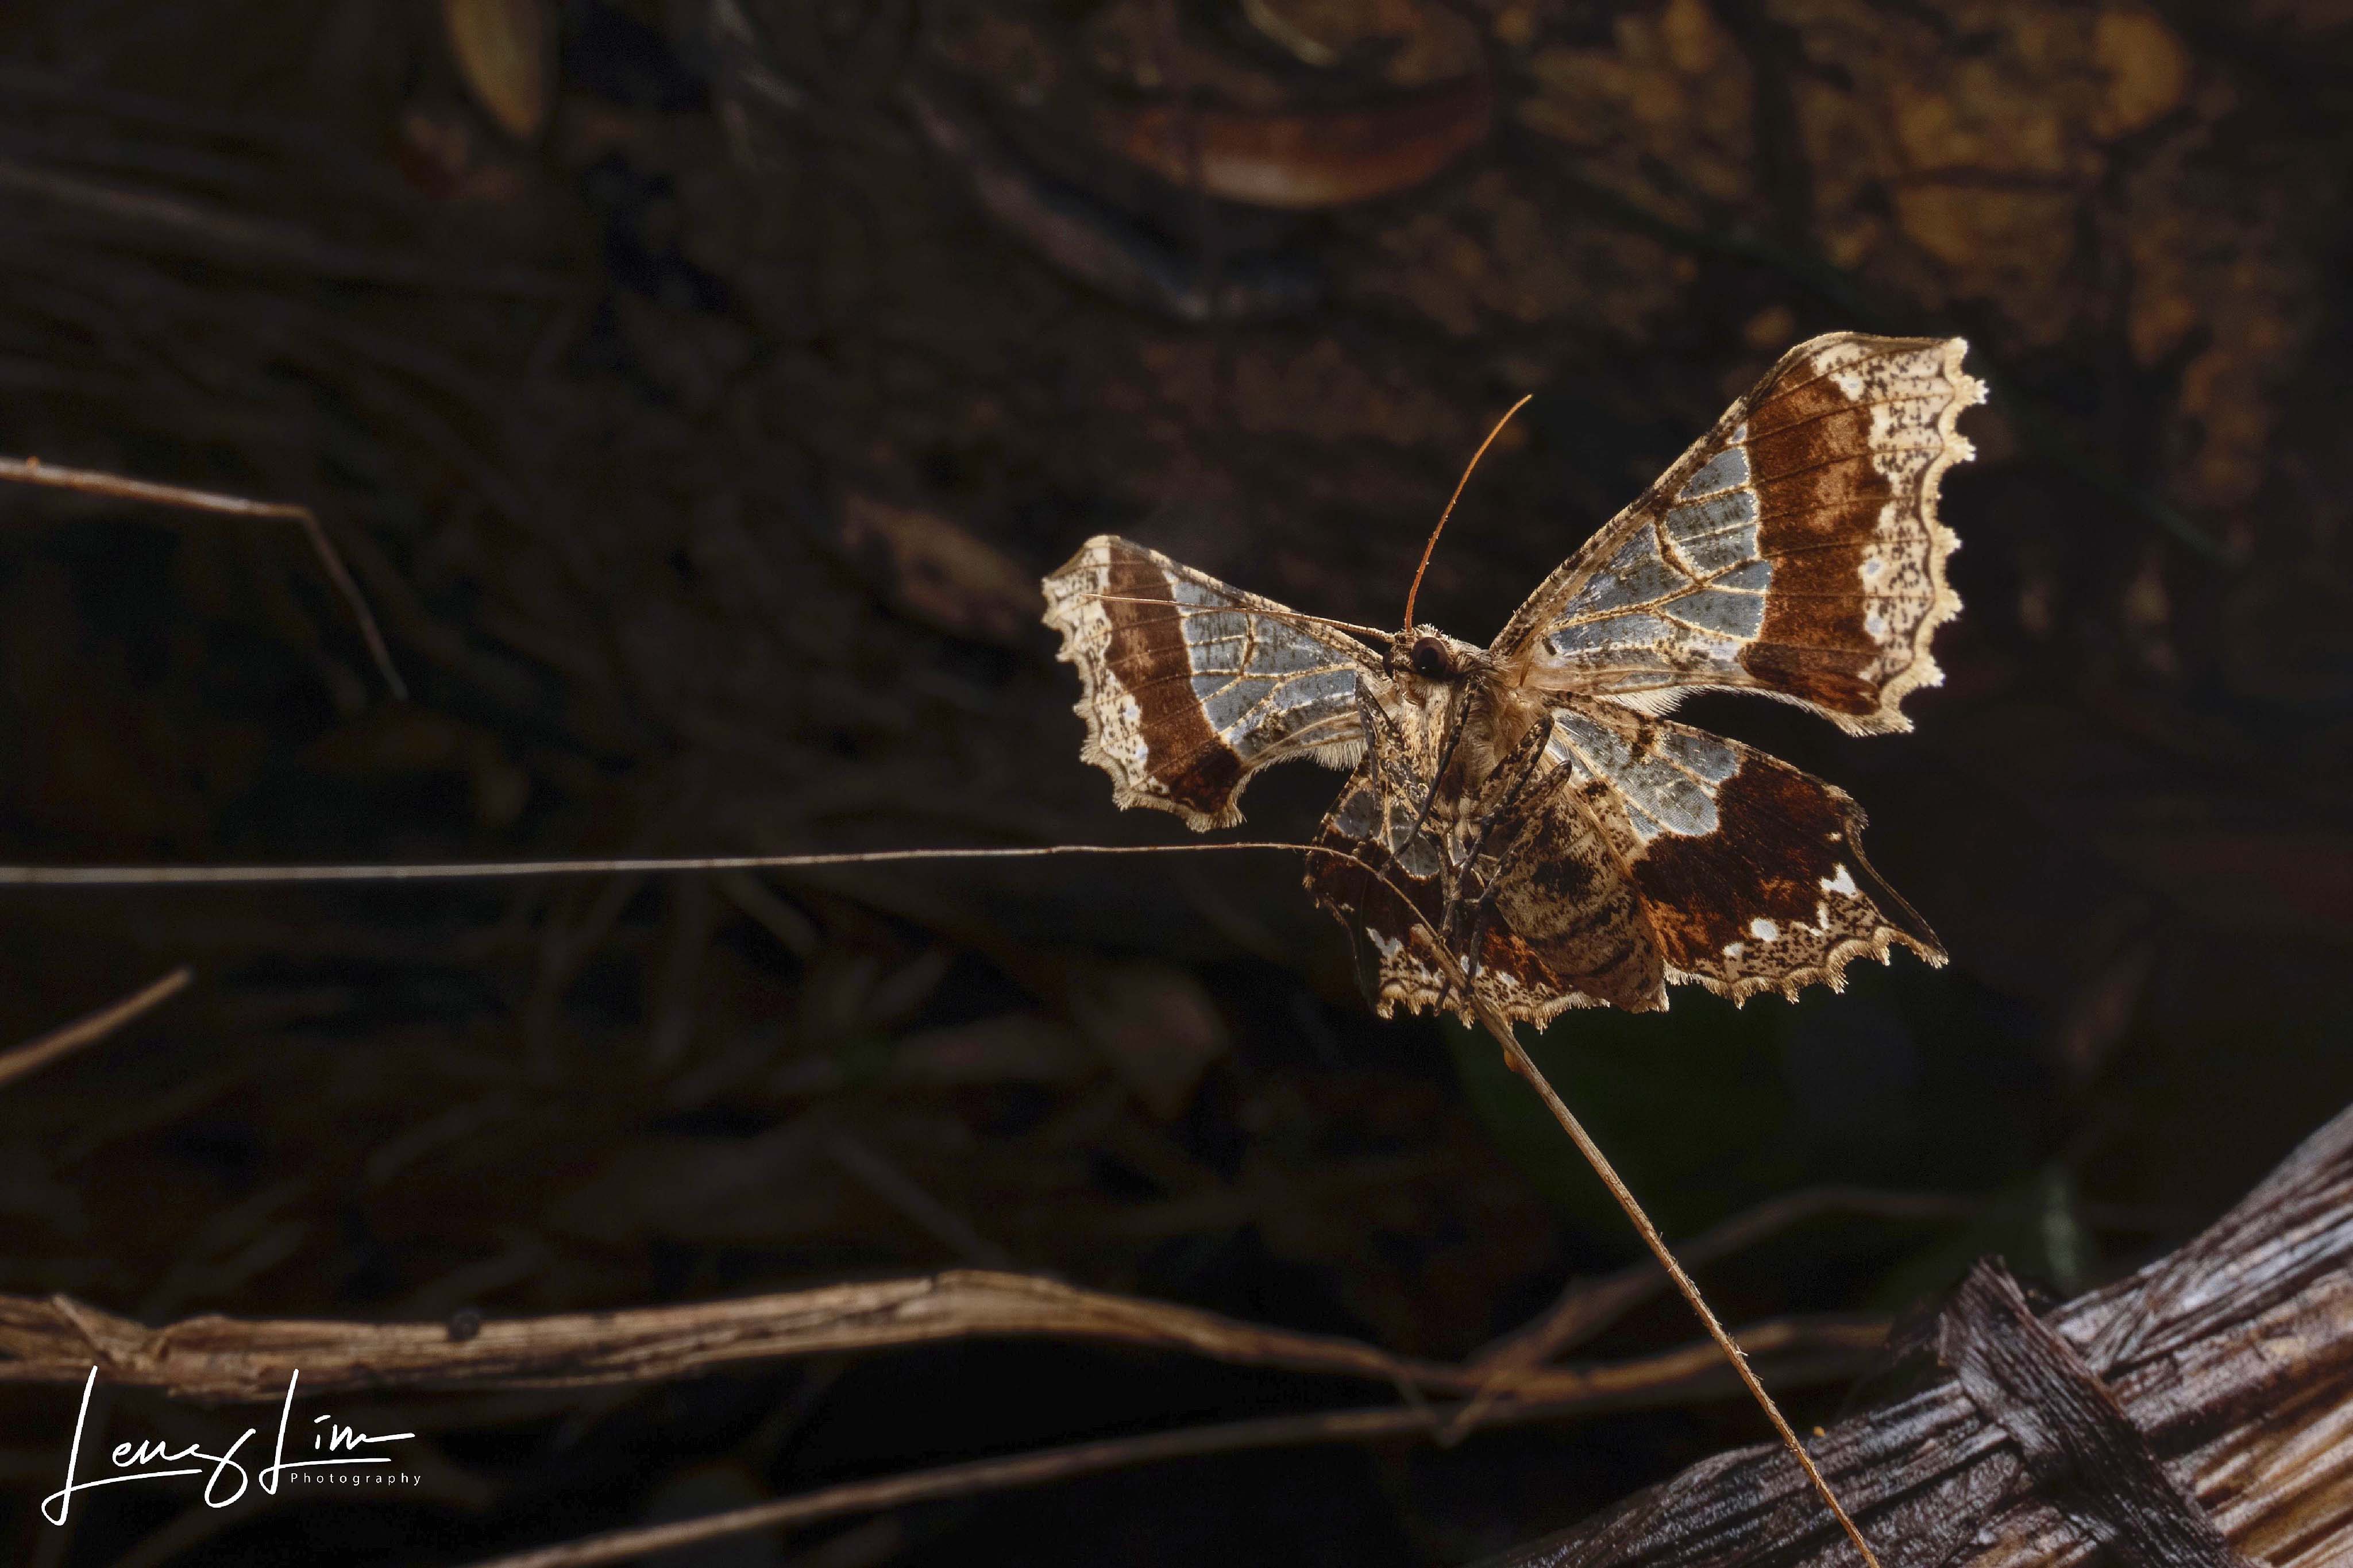
Krananda semihyalina
1/100s, ISO 400, f/16
There is no right or wrong and it all boils down to your style of photography and where people see value in your images. Those images at higher magnifications are beneficial for science/research purposes and could be considered a more ‘documentary-style’ of photography rather than ‘abstract’.
On the other hand, taking ‘a step back’ (figuratively speaking cause you literally will be moving closer) and capturing the subject in its natural habitat is more informative and brings about even more scientific-value compared to an image of just the subject itself. More often than not, you will be free to tell the story through your composition.

Katydid (Tettigoniidae)
1/125s, ISO 200, f/16
That is where specialised Wide-angle Macro lenses come into play, to solve the compositional problems of all macro photographers. Venus Optics kindly sent me their Laowa 15mm f/4 Macro lens for some experimentation with this rather unconventional method of macro photography. Covering a wide angle view of 110° coupled with 1:1 magnification capabilities, users are able to photograph highly magnified and detailed subjects whilst capturing more of the environment/scene.
Ergonomics and Design
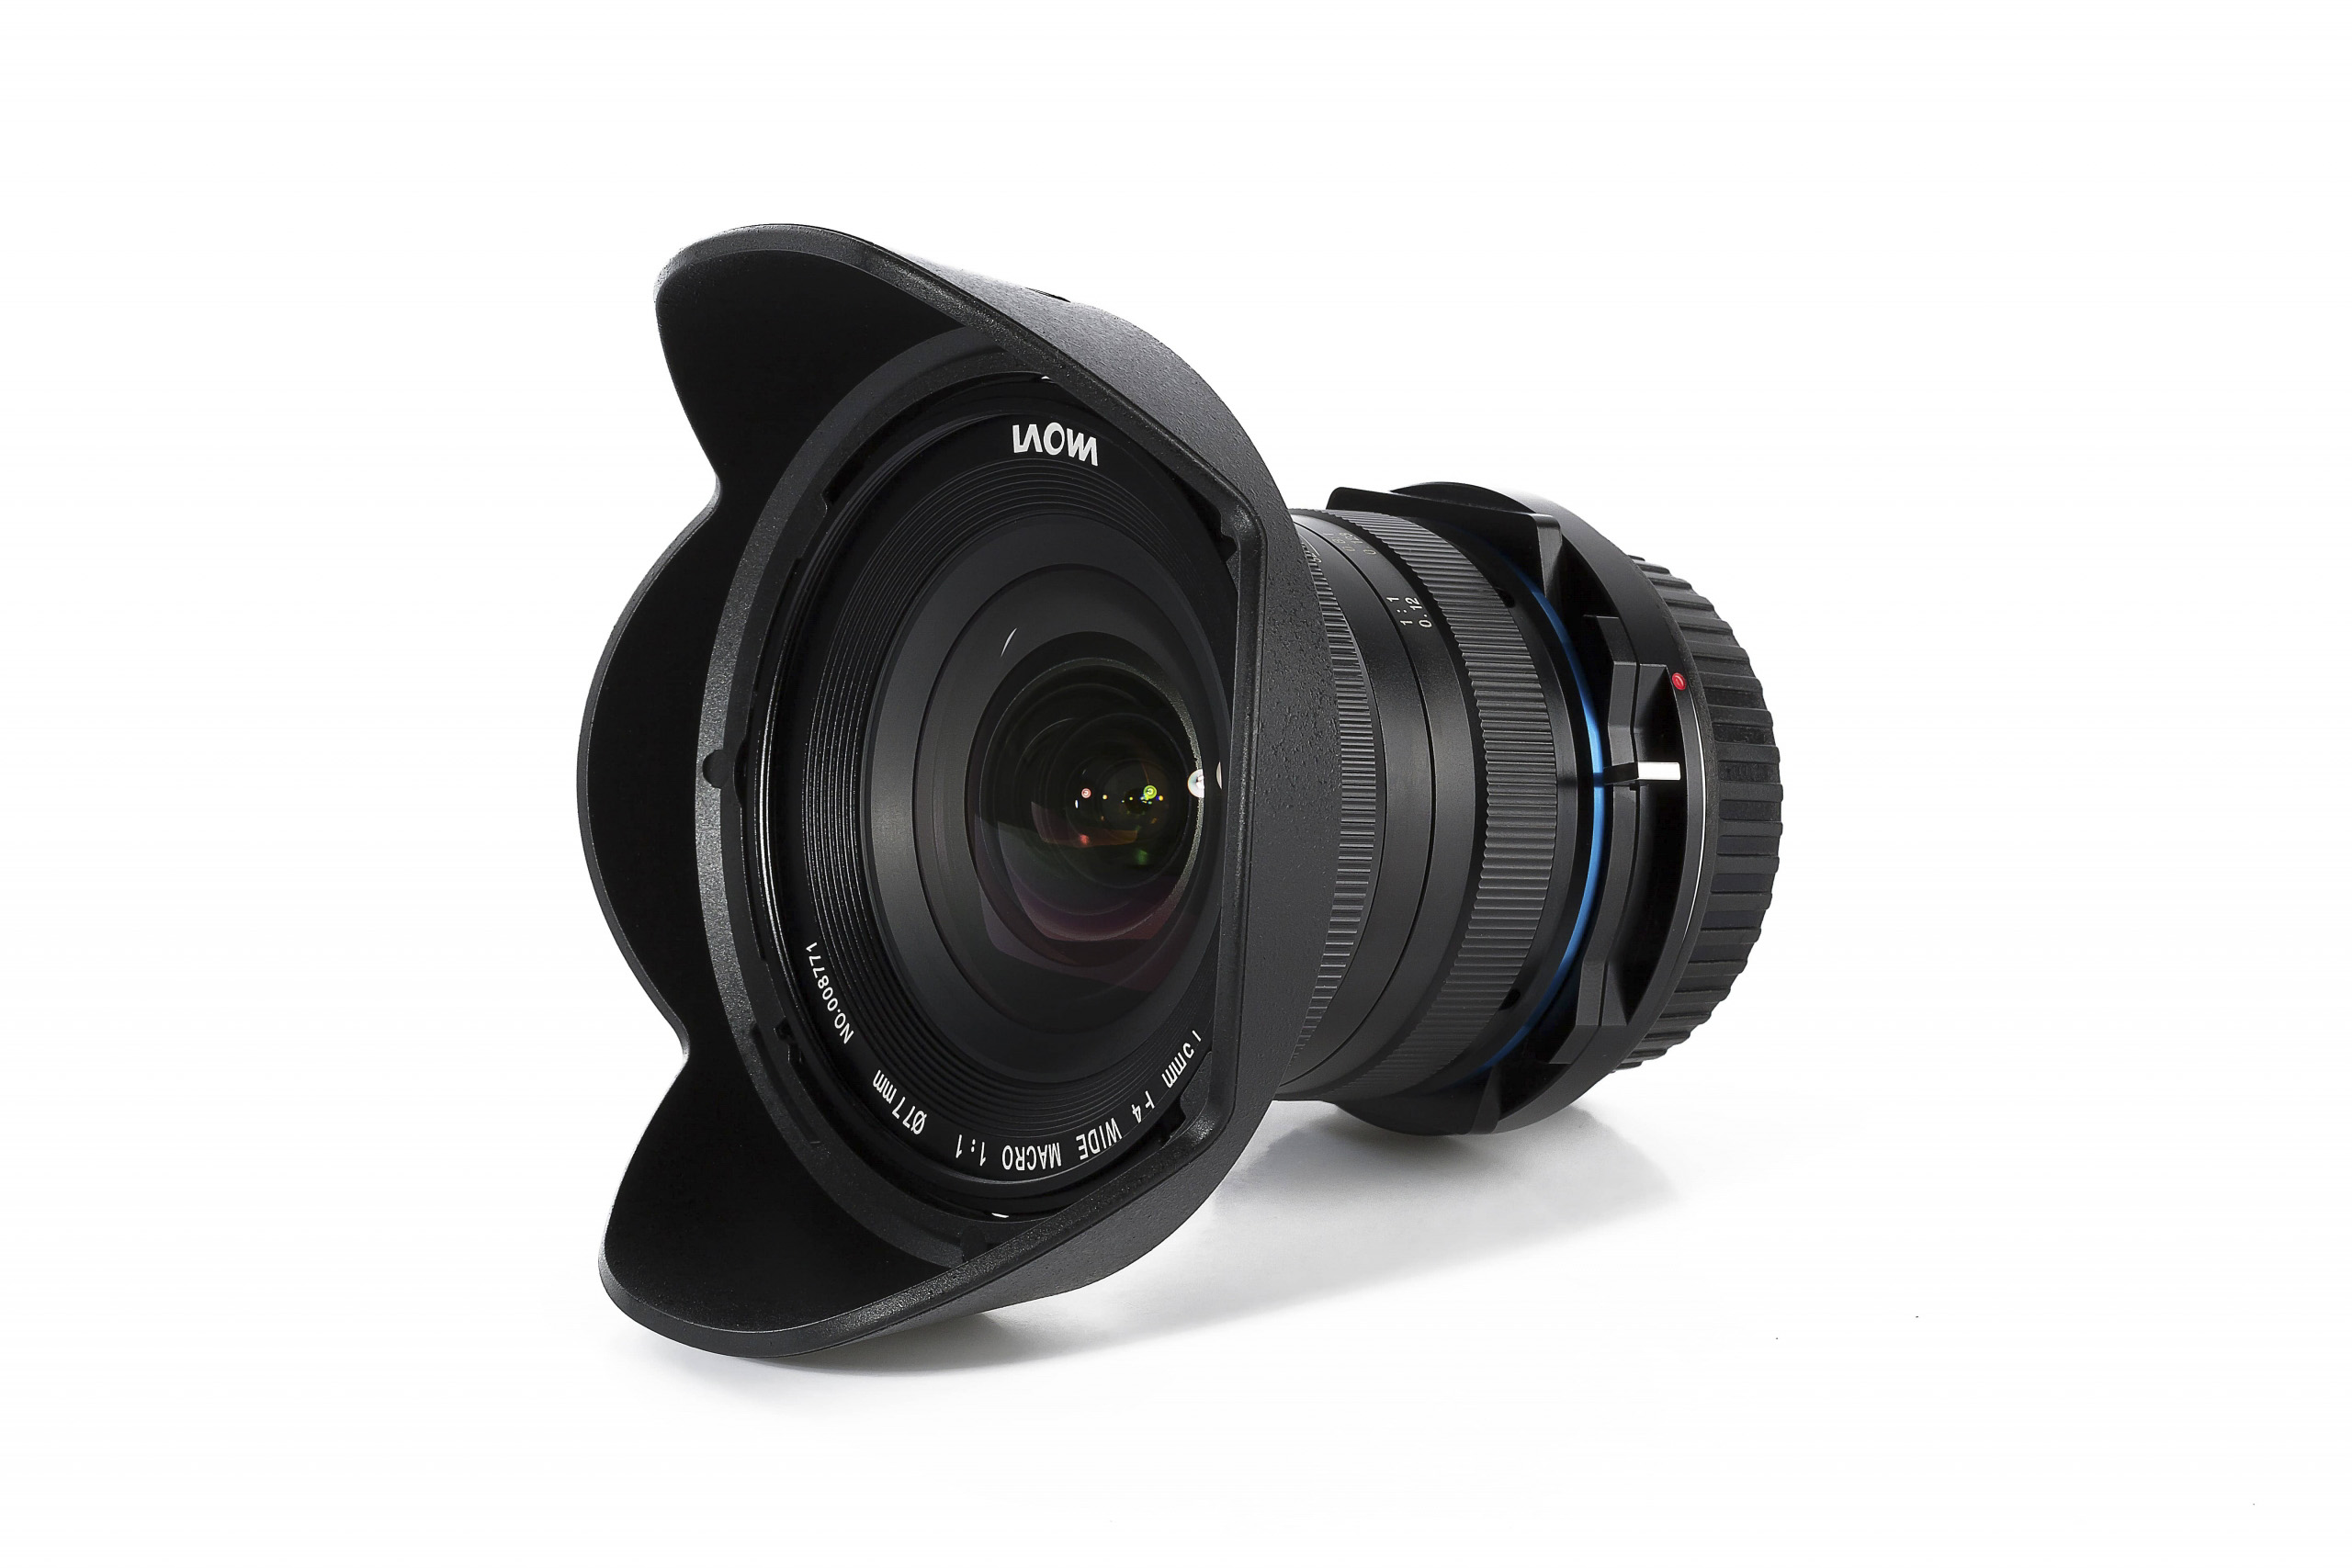


Being only approximately 8cm in length and 410g, this lens is compact and easy to handle. Having a small, lightweight lens can be very beneficial to field work in terms of one-handed operations and the short focal length allows you to push your shutter speed way down whilst minimising motion blur. I stowed the lens hood away for macro work.
This a fully manual lens and you will have two rings to work with. The 1st ring from the front element being the aperture ring and the 2nd ring being your magnification (focus) ring. Unfortunately, the aperture ring has no click stops and can be easily rotated out of position. One of the limitations of having a fully manual lens will be the lack of certain EXIF data recorded in your images, especially if aperture data is important to you.
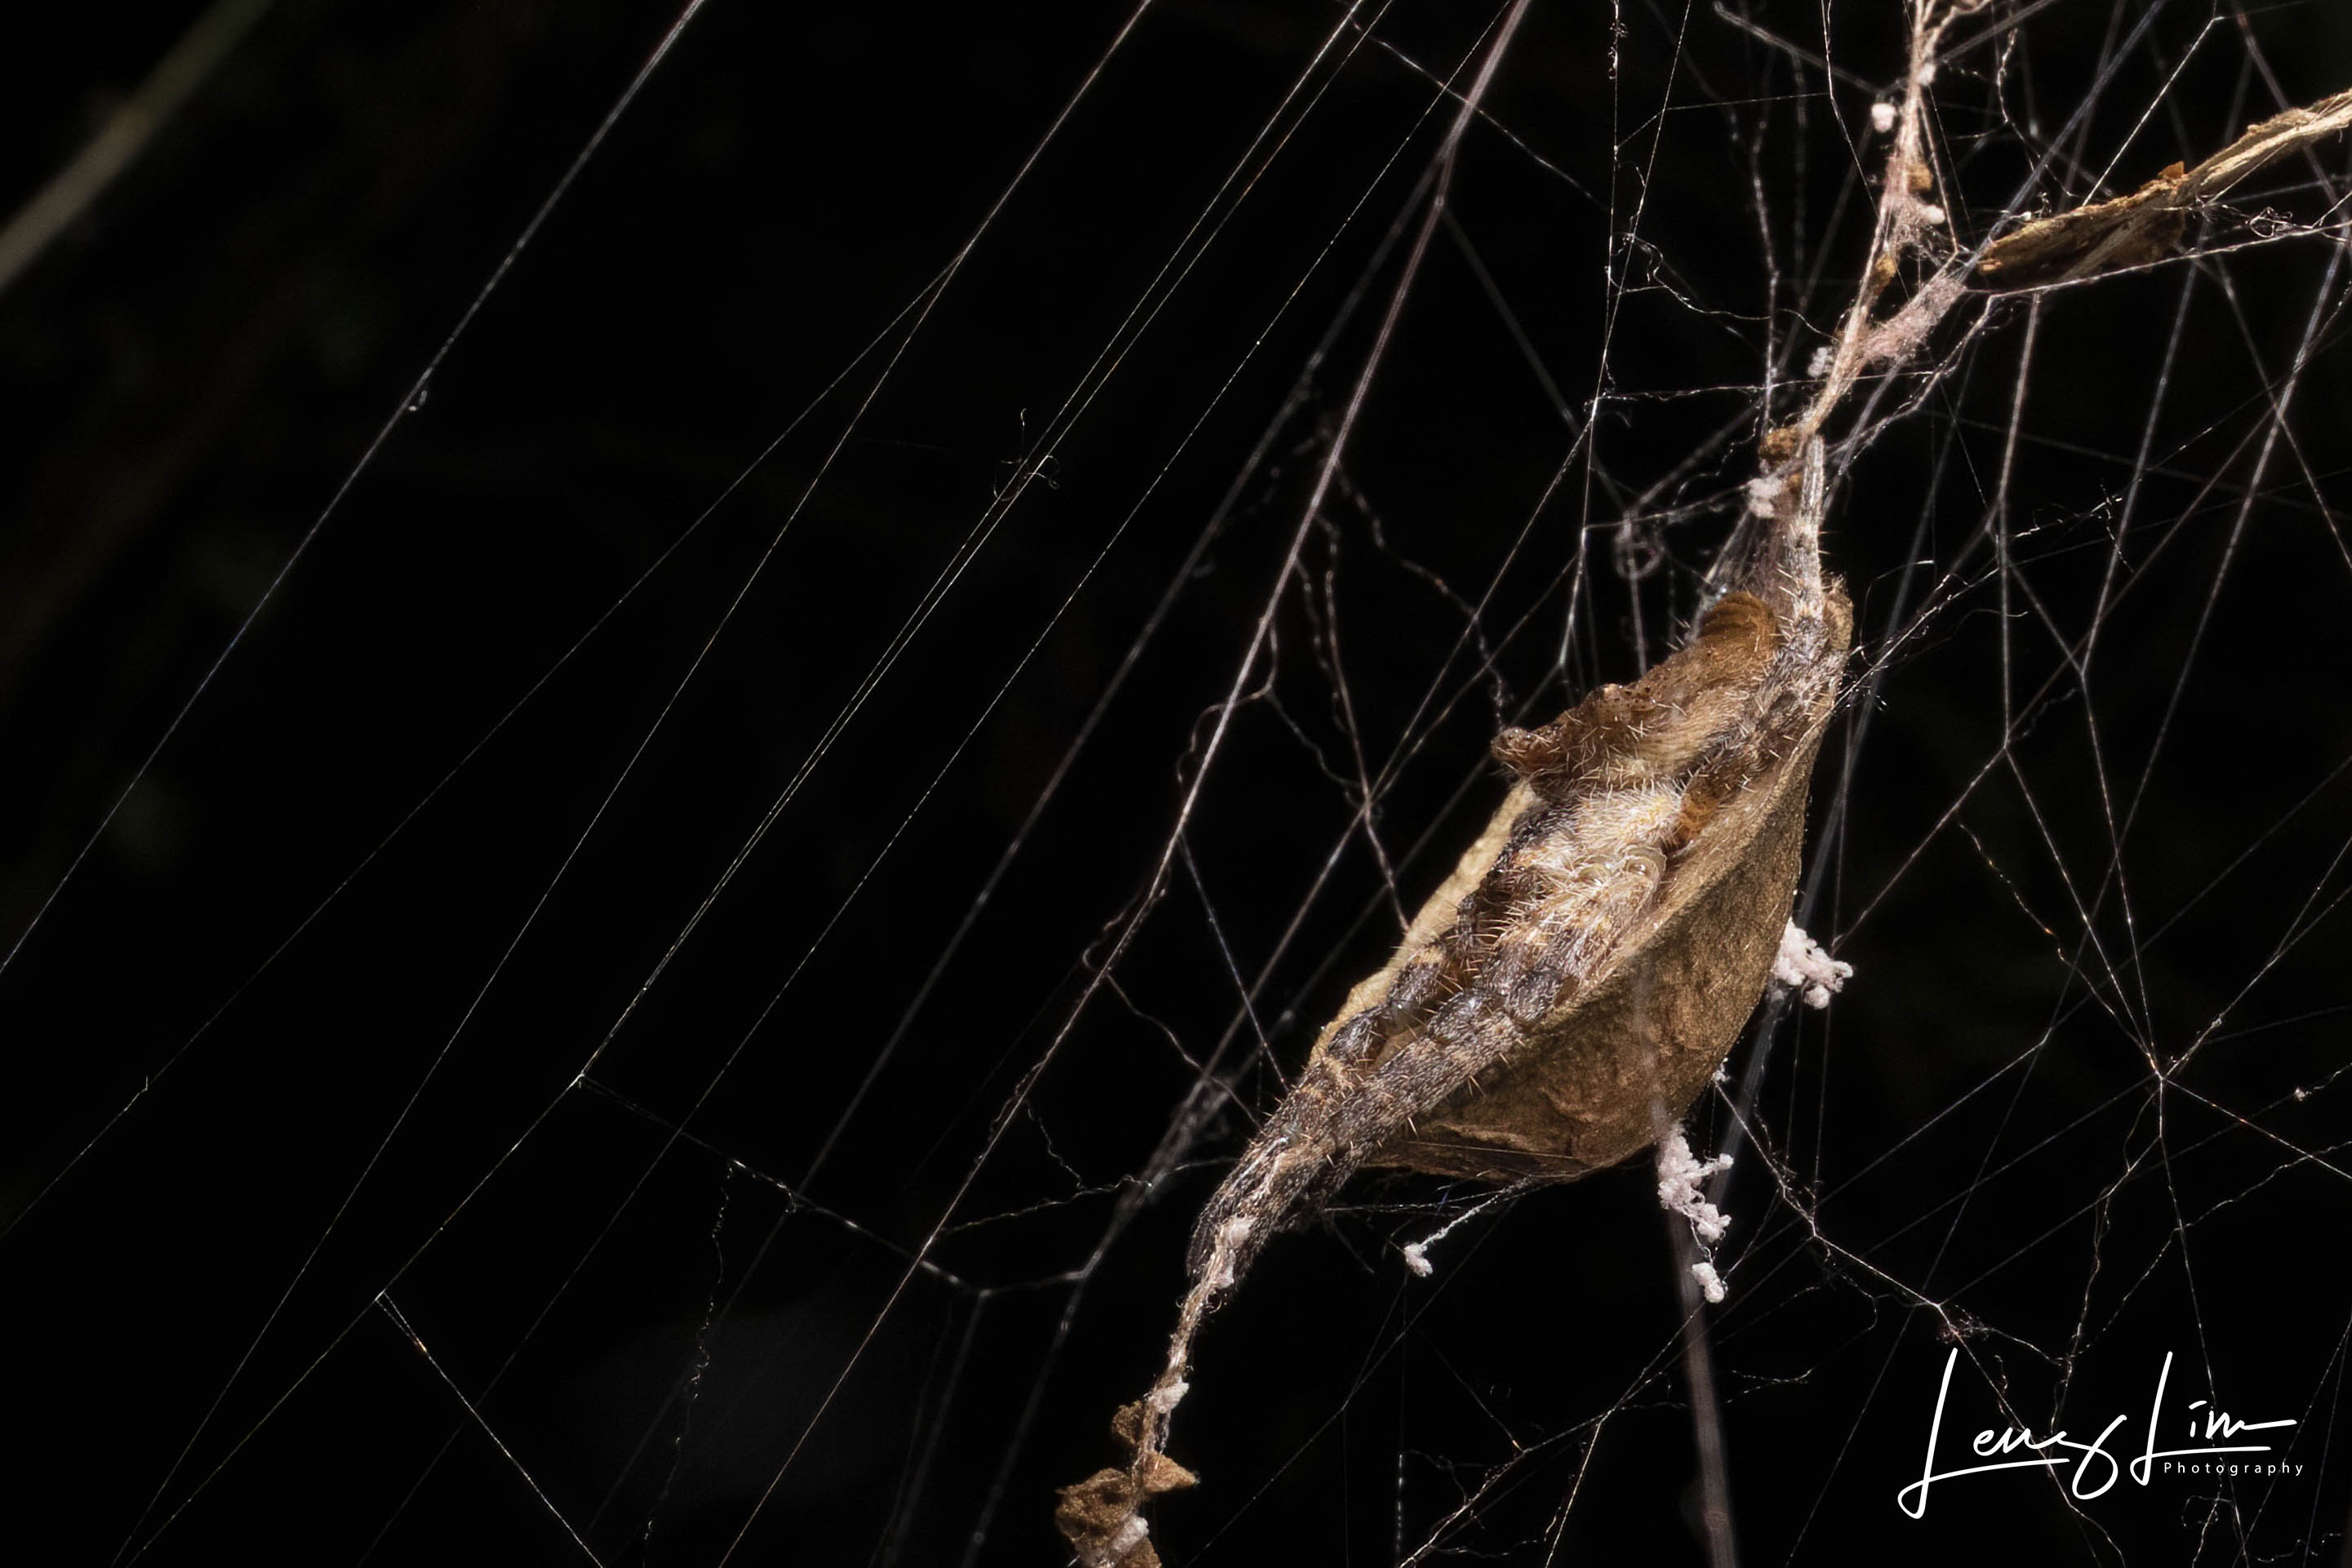
Tent Spider (Cyrtophora sp.)
1/125s, ISO 200, f/16
This not a full tilt-shift lens, it’s just a ‘shift’ lens, allowing perspective correction of a 6mm adjustment up or down from the center. The little silver lever engages this mechanism but the adjustment is clickless and with no scale available, precise control will be lacking. Mostly, I ended up just using the full 6mm only when faced with subjects that are too high (above eye-level) or if I had to get so low to the ground to reach the subject’s eye-level. Image above shot with 6mm shift up.
The lens covers the full 35mm frame and is available in the Canon EF, Nikon F, Sony A/FE, Leica L and Pentax K mounts.
Okay, lets address the elephant in the room. This lens is a tough one to use. It has been long time since I felt the frustrations of doing macro in the field; spending an unacceptable amount of time with a single subject, out-of-focus images, tired out wrists and poor results from my lighting system. If you are struggling with the most standard of macro shots, this lens may seem impossible to overcome.
Here are some of my findings while using this lens.
Image quality
Sharpness

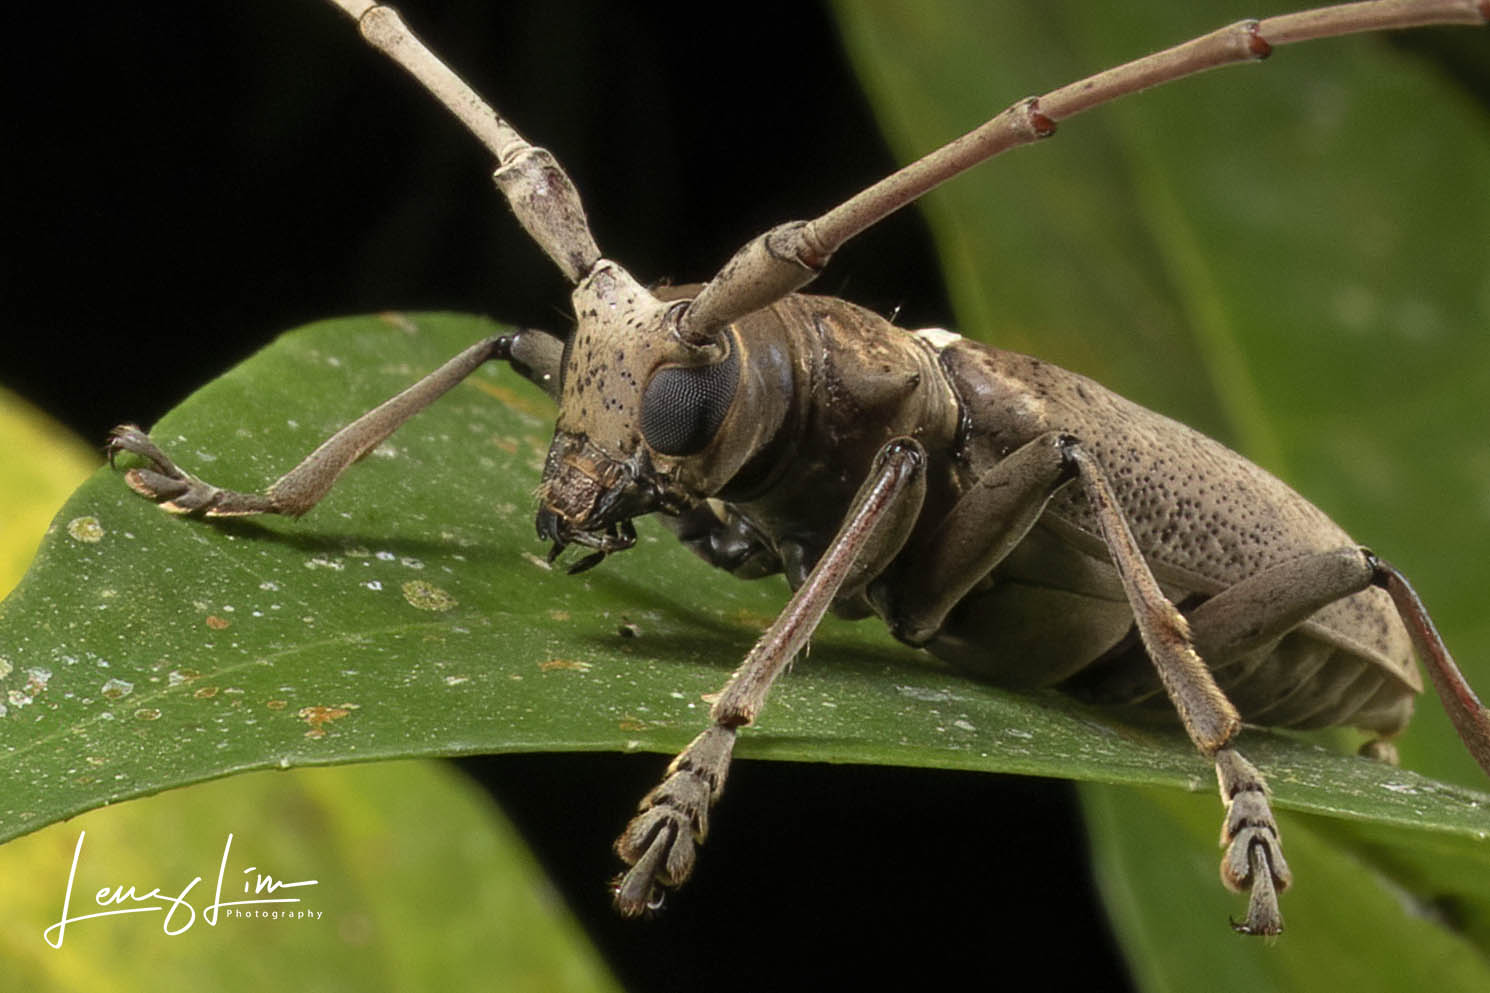
Flat-faced Longhorn Beetle (Acalolepta sp.)
1/125s, ISO 250, f/16
This lens is sharp when you get your lighting and focus right. Sharpness does fall off the edges a little and you will notice a slight vignette in the corners. Consider the image above, uncropped and cropped, photographed with an old Canon EOS 7D mark ii that only has 20.2 megapixels. Imagine using a new APS-C sensor camera body like the Canon 90D which boasts 32.5MP, the pixel density would allow extraction of all that detail you could possibly want.
Bokeh and Chromatic Aberration (CA)

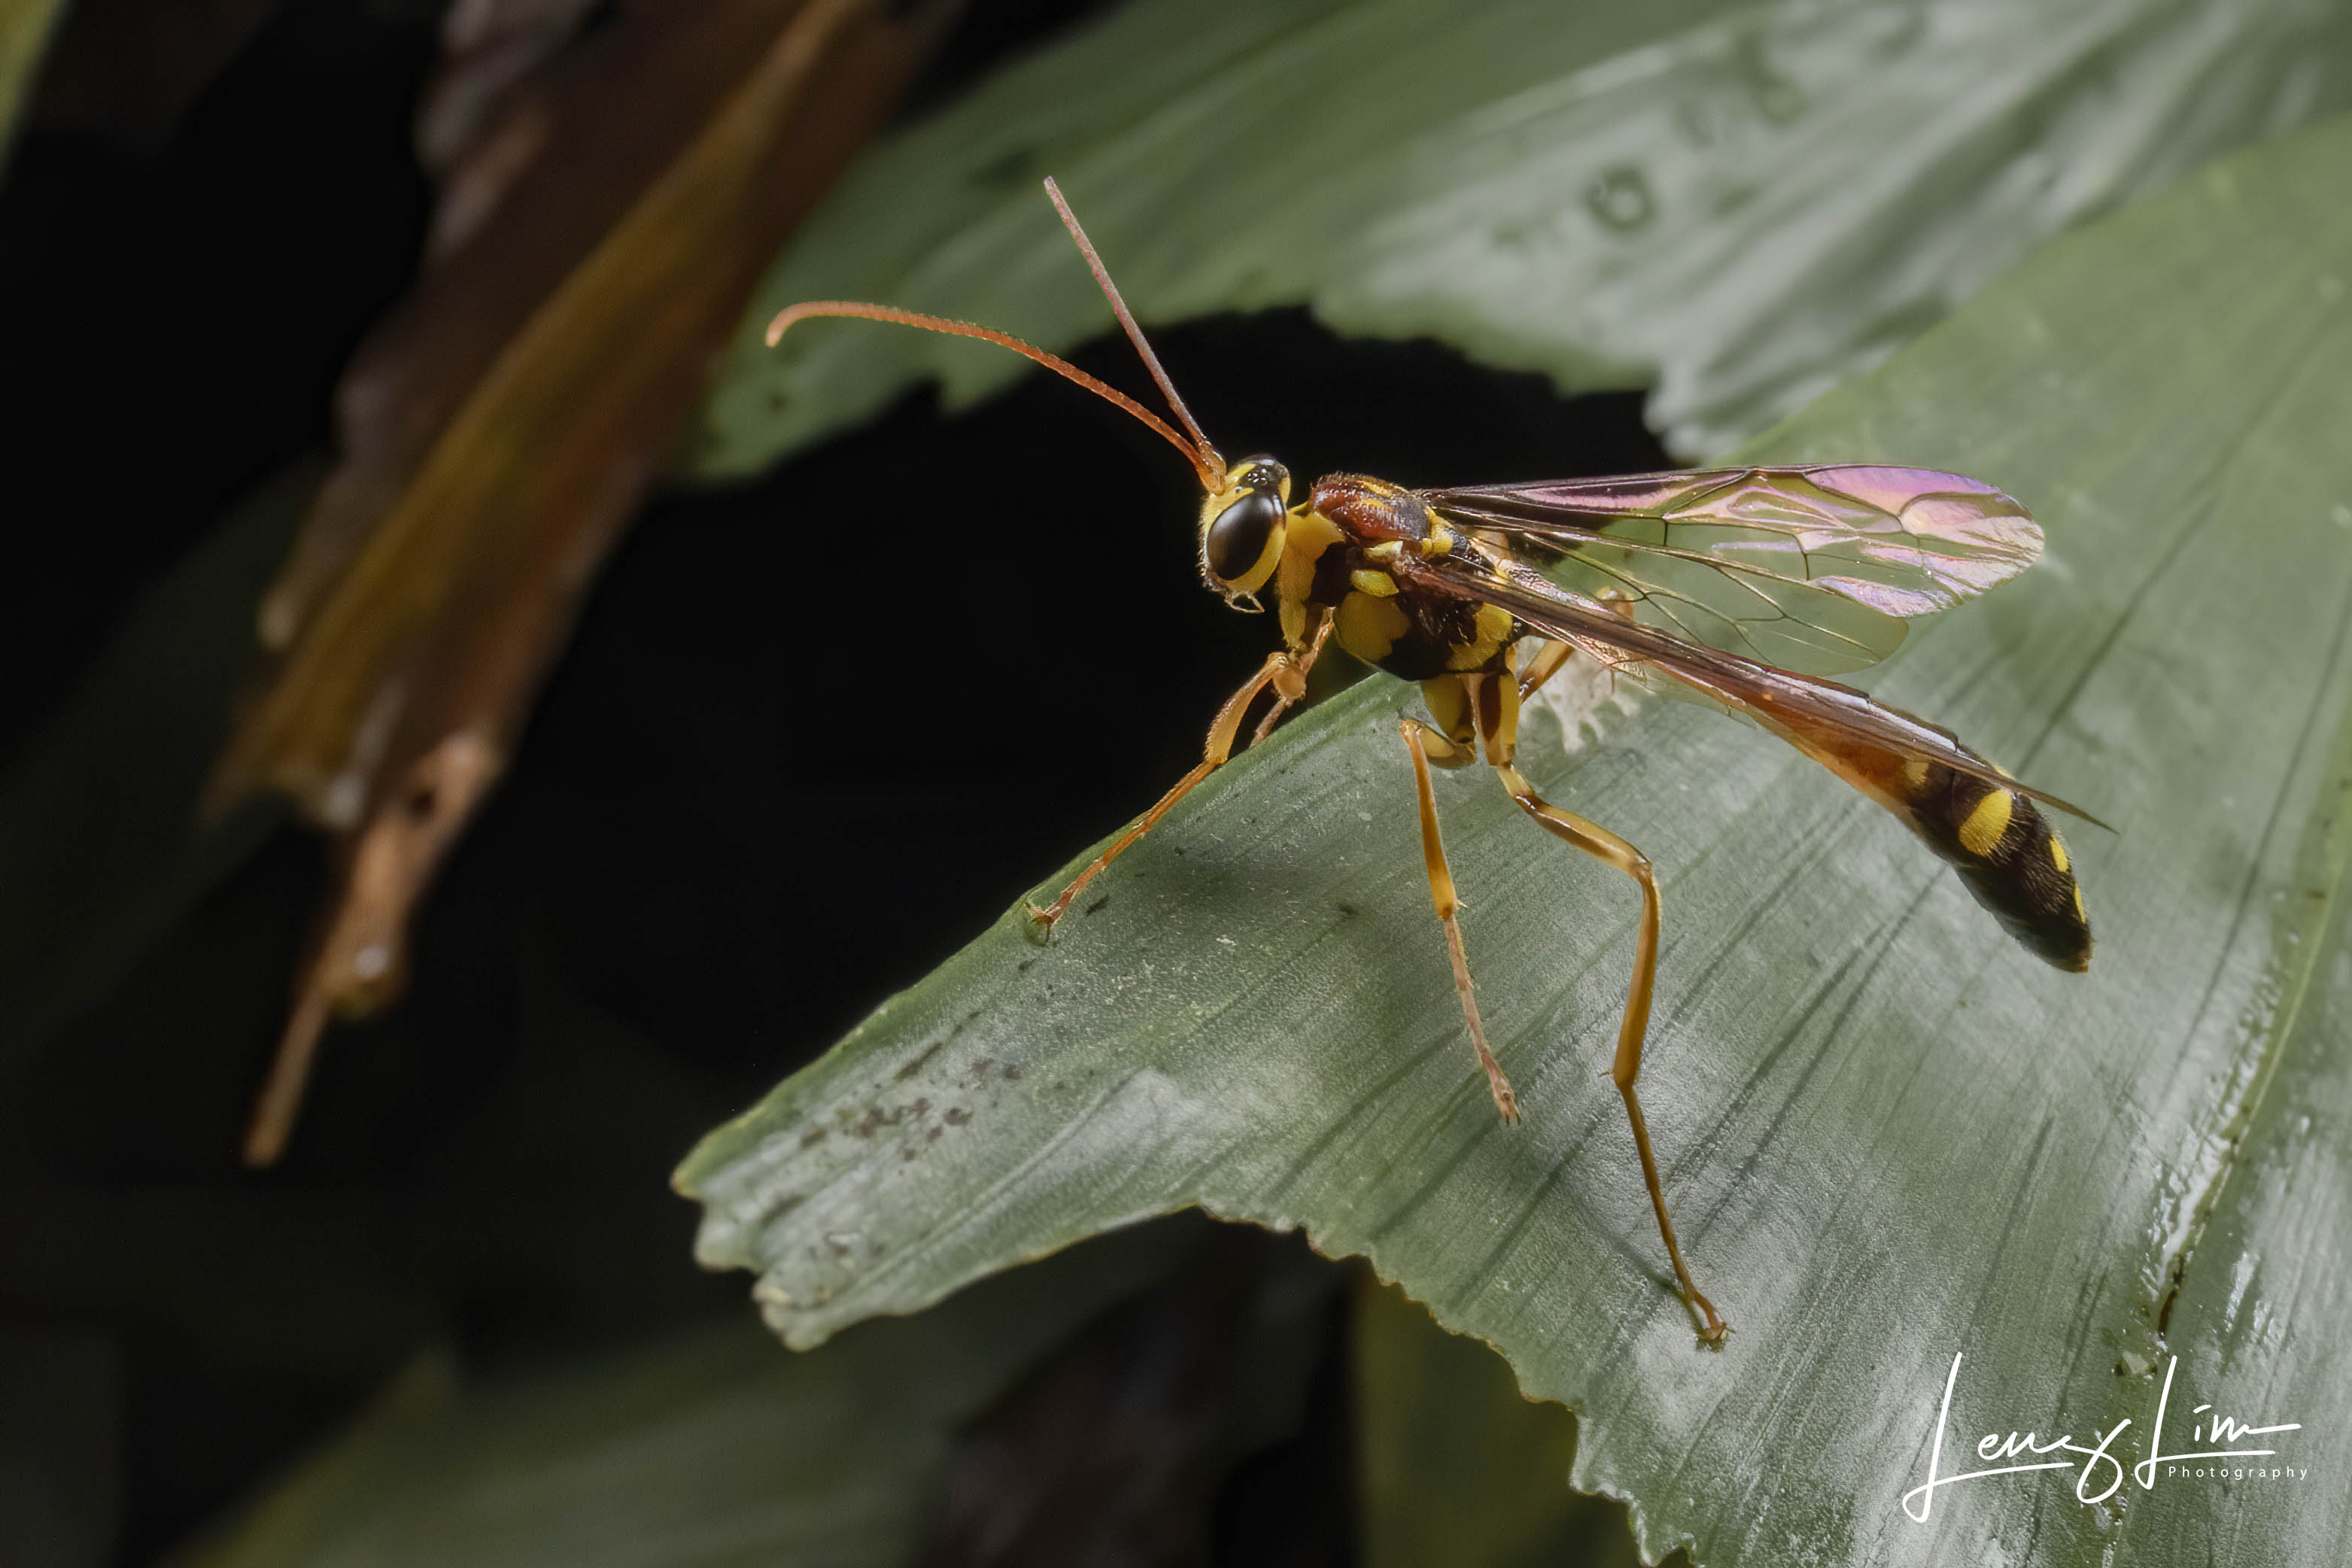
Wasp (Apocrita)
1/100s, ISO 800, f/16
Getting a large depth-of-field (DOF) is expected when using a lens of this focal length and achieving a slightly blurred background may be challenging unless there is a large background separation with your subject. The bokeh and blur you get when done right is actually very gradual and the 16-bladed aperture produces natural “bokeh-balls”. CA is well controlled in the high contrast areas where light seeped through the canopy in the image above. Note however that at macro-focusing distances as you get closer, CA would be present and you may need to fix it in post.
Barrel Distortion
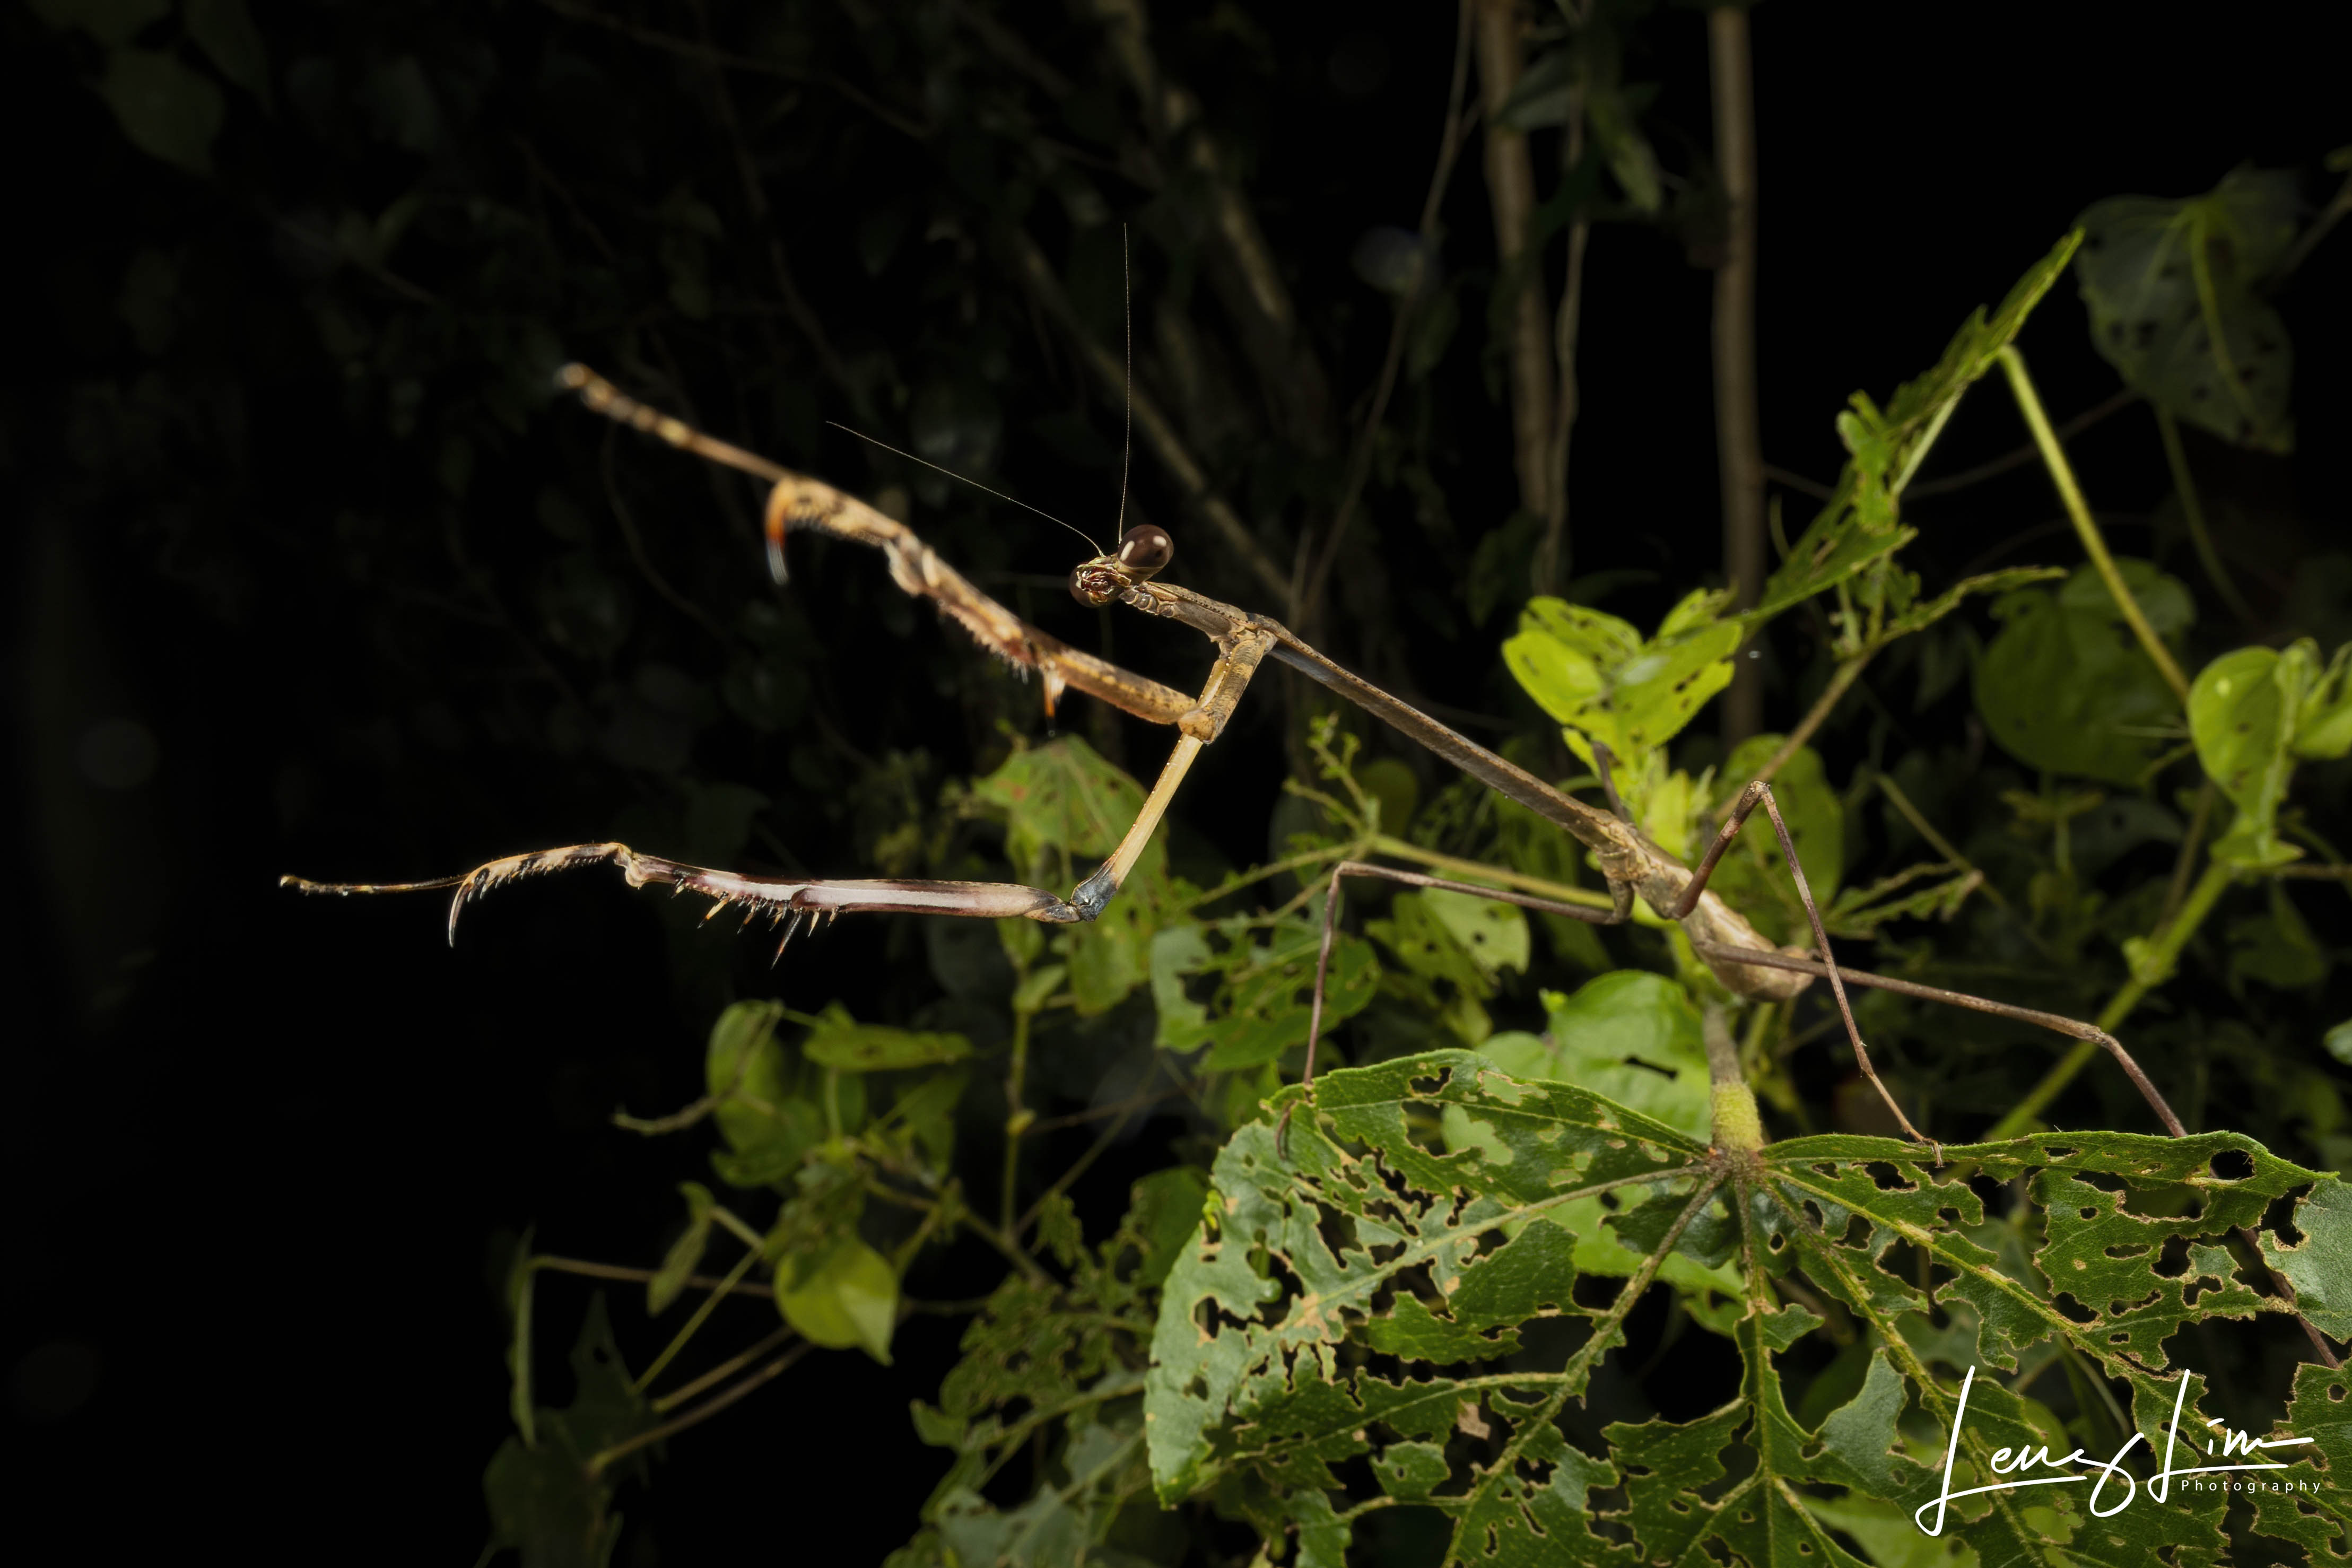

Giraffe Mantis (Euchomenella sp.)
1/80s, ISO 250, f/16
Some may see this as a flaw in the lens, where the image magnification decreases from the centre of the lens where the optical axis is, producing a “fisheye” effect. I see this as an opportunity to create more intriguing images, which is basically the whole point of getting this lens! This perspective draws your subject closer, making them appear larger. Stray away from the norm and explore your artistry.
Even if this is a problem for you, barrel distortion is simple to correct in post.
Operational Considerations
Working distance and subjects

Leaf Katydid (Chondroderella borneensis)
1/125s, ISO 250, f/16

Leaf Katydid (Chondroderella borneensis)
1/125s, ISO 100, f/16
The working distance for this lens at 1:1 magnification is a mere ~4.7mm. With a working distance like that, chances are your subject would be spooked out with that huge front element approaching it. Therefore, using this lens to photograph larger subjects like the katydid above (~7.5cm in length) would be the most feasible. Although you can move back a little for the subject to fill the frame, you would still be pretty close to the subject. That being said, the subjects you photograph have to be compliant. If they are, then shooting smaller subjects would pose less of a problem, although I would shoot at 1:2 or smaller.

Wide-jawed Jumping Spider (Viciria praemandibularis)
1/100s, ISO 800, f/16
Articulating Screen

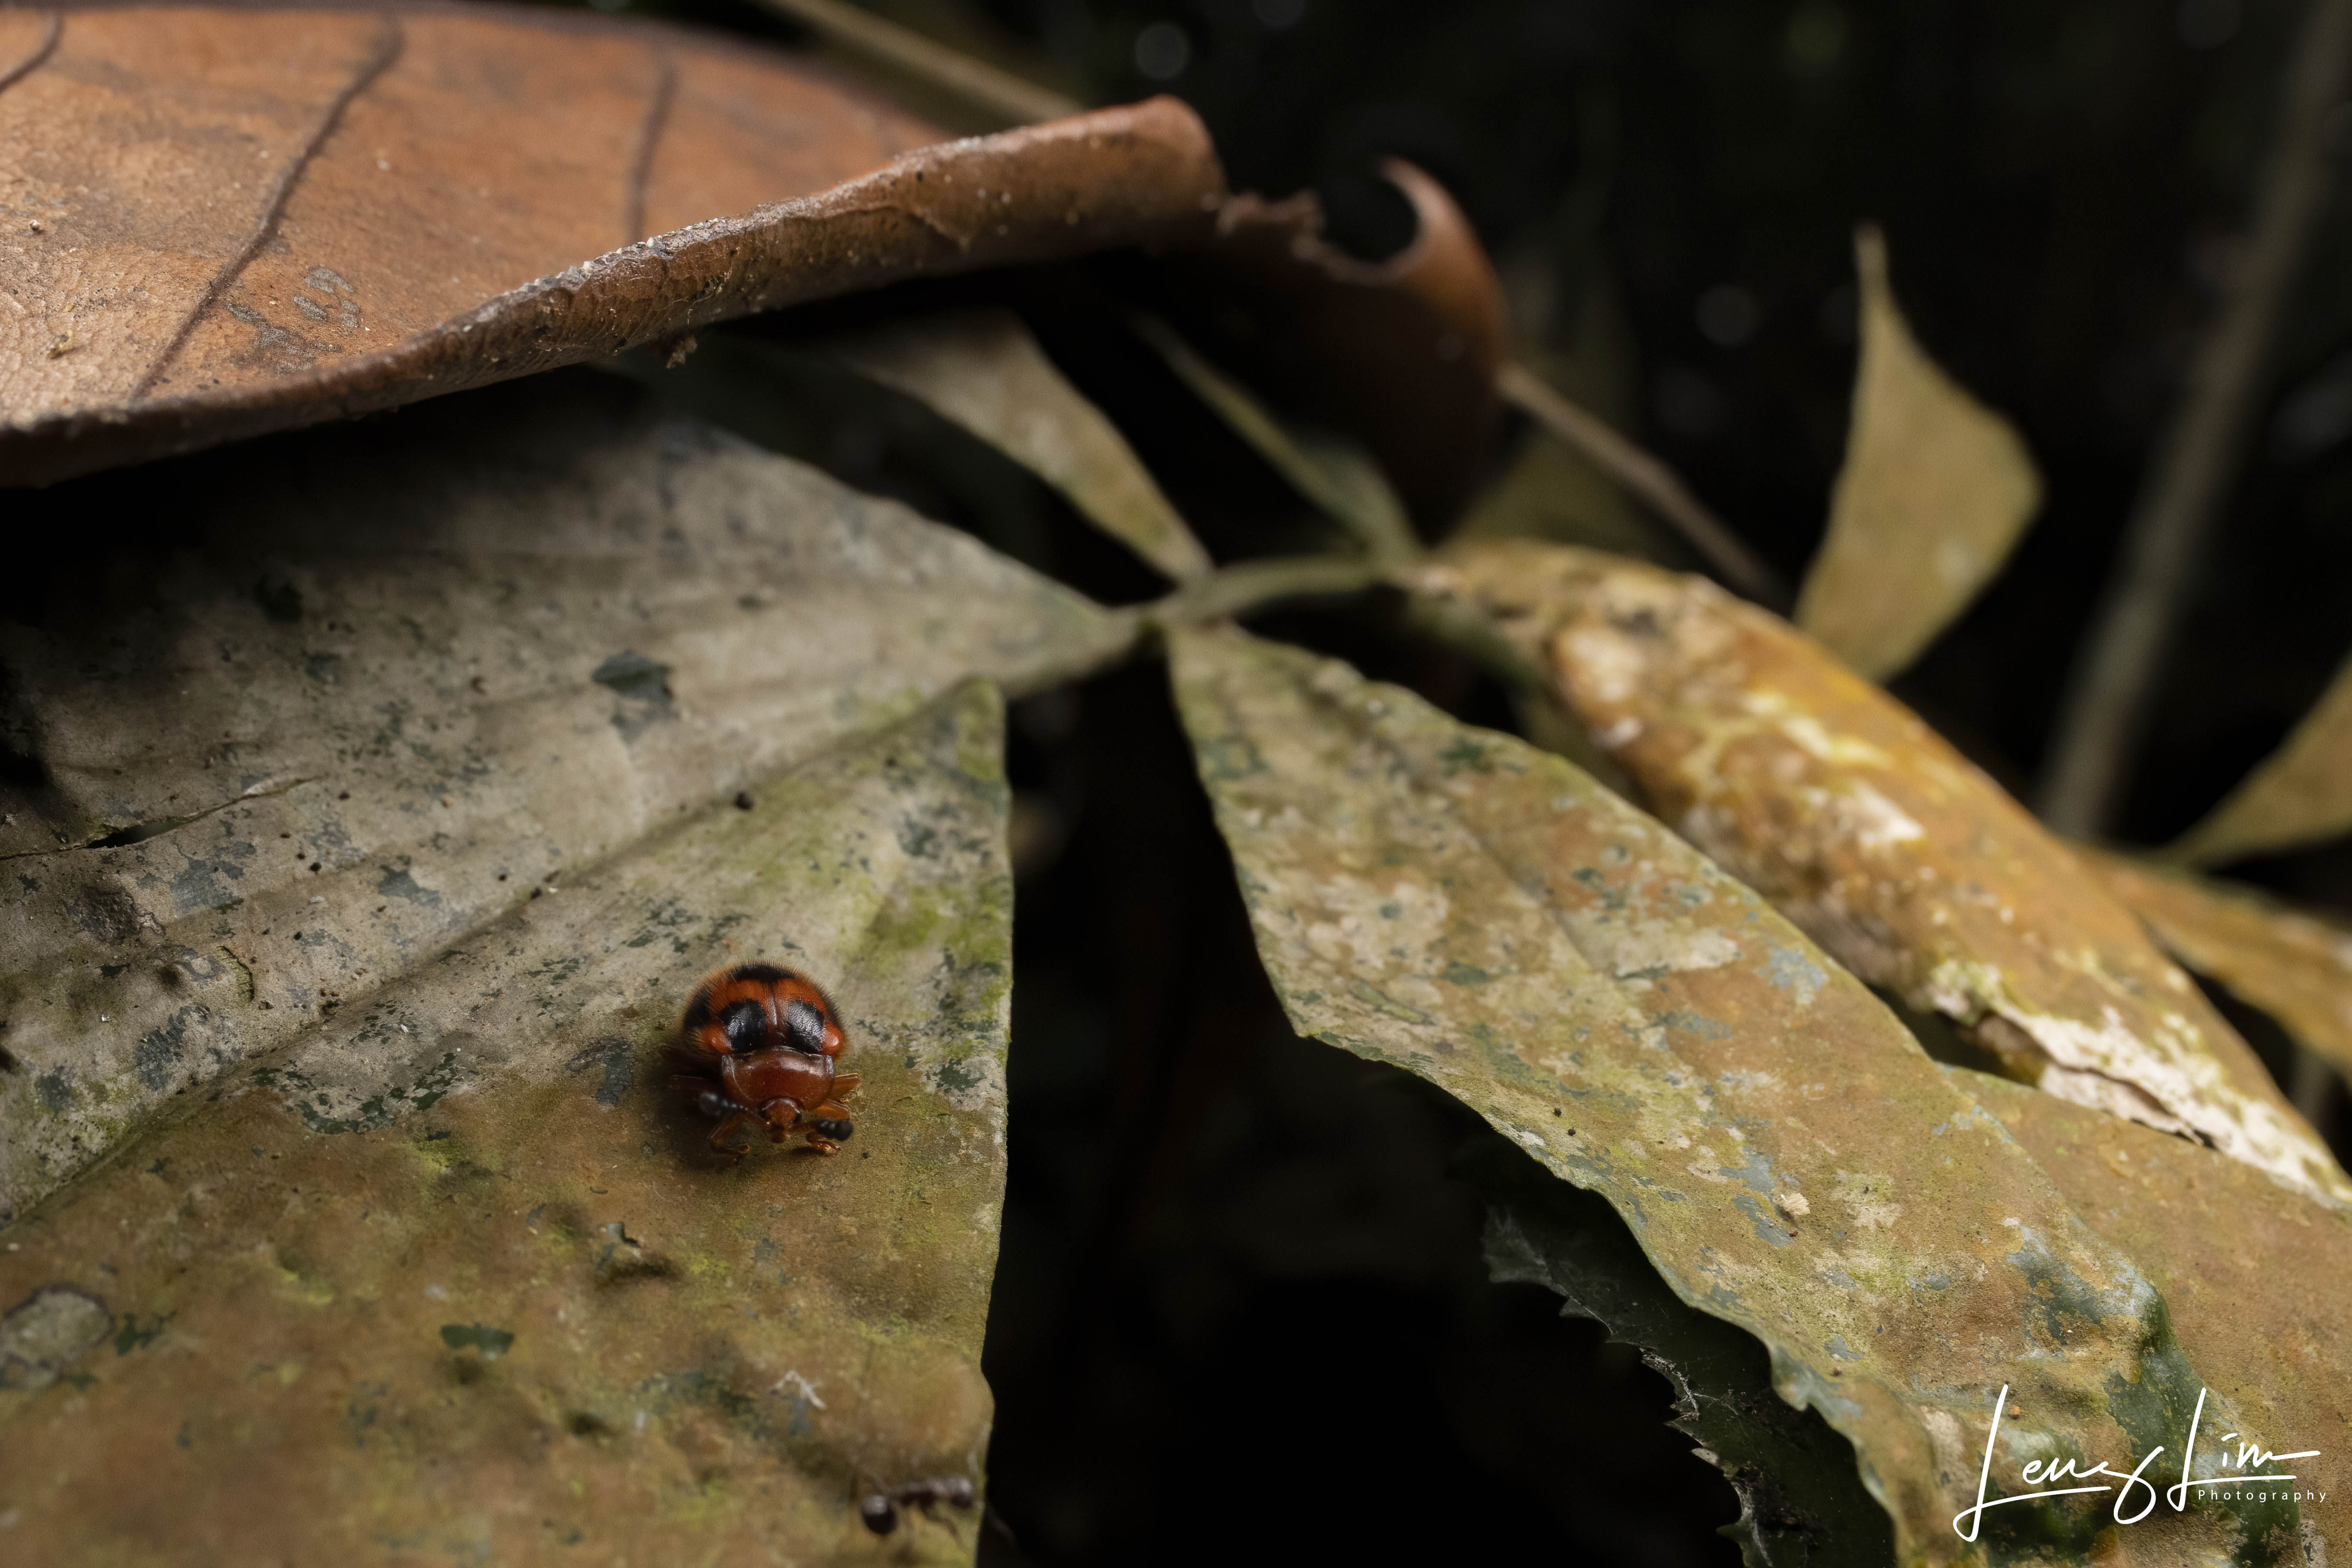
Land snail (Sarika resplendens)
1/125s, ISO 200, f/16
Besides getting your basic techniques right, the equipment you use will really boost your chances of getting the shot. For one, having an articulating screen is of utmost importance to get the angles right. Your subject may be real high, or way down low. Regardless, getting to your subject’s eye-level generally (in most cases) creates more intimate images with unique perspectives, especially when using a wide-angle lens. I found myself shooting with the articulating screen 90% of the time. This is also where that shift function comes in handy. With your subject on the ground, shifting the lens 6mm down allows you to photograph it at an even lower angle, where physically impossible for the lens barrel to reach.
Magnification tool

Crab Spider (Thomisus sp.)
1/125s, ISO 100, f/18
A fantastic feature present in most camera bodies that enables precision focusing. I did not see it’s worth until I started using this lens. With that ultra wide perspective, it can be difficult to establish whether the subject’s eyes are in focus, especially if you are photographing a relatively small subject. Use the magnification tool together with your camera’s live view, and you will find focusing much easier.
Lighting System

Lichen Huntsman (Pandercetes sp.)
1/125s, ISO 200, f/16
This was one of the biggest obstacles to overcome. That standard huge dome diffuser that we are all so used to could be seen in the images due to its size. Furthermore, when focusing at 1:1, the lens itself will cut out most of the light from your flash and shadows would be cast on your subject. A way to curb this is to wirelessly trigger the flash. However, that takes up one of your hands or you have to spend time mounting your flash on a stand and that simply is not the kind of workflow I want. Furthermore, I want to have the flexibility to switch up to my primary macro lens when needed, without having to switch my lighting system. Eventually, I found that using twin wireless flashes with articulating arms would be the best fit for my workflow.
Final thoughts

Previously to achieve this effect, modifications and other accessories like relay lenses, extension tubes etc. had to be added onto macro lenses and that resulted in complicated set-ups. Now, you can do all that with this compact lens at a modest price.
This lens has proven to be a great addition in my arsenal. It may take some time to get used to, but in the right hands, it can produce thought-provoking and dramatic images. Should you get this lens, think about your lighting system, standard speedlites may not be the best choice unless you have a free hand, assistant or you have so much time in the field to set-up your lighting. Using multiple flashes can also help to both illuminate the subject, as well as the environment if need be.
If I had to single out downsides to this lens, is that the focusing distance to the subject is way too close. 4.7mm is not exactly a comfortable working distance for both you and the live subject. This deters me from attempting this lens with smaller subjects. Having automatic aperture control like the one in the outstanding Laowa 100mm f/2.8 2:1 lens Canon EF mount, would be a fantastic feature to have.
If my review has enticed you to get one of these lenses, do refer to this link to further support me in generating more content like this. Do like, share and comment if you have any questions.


More sample images on my instagram page.
